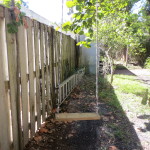
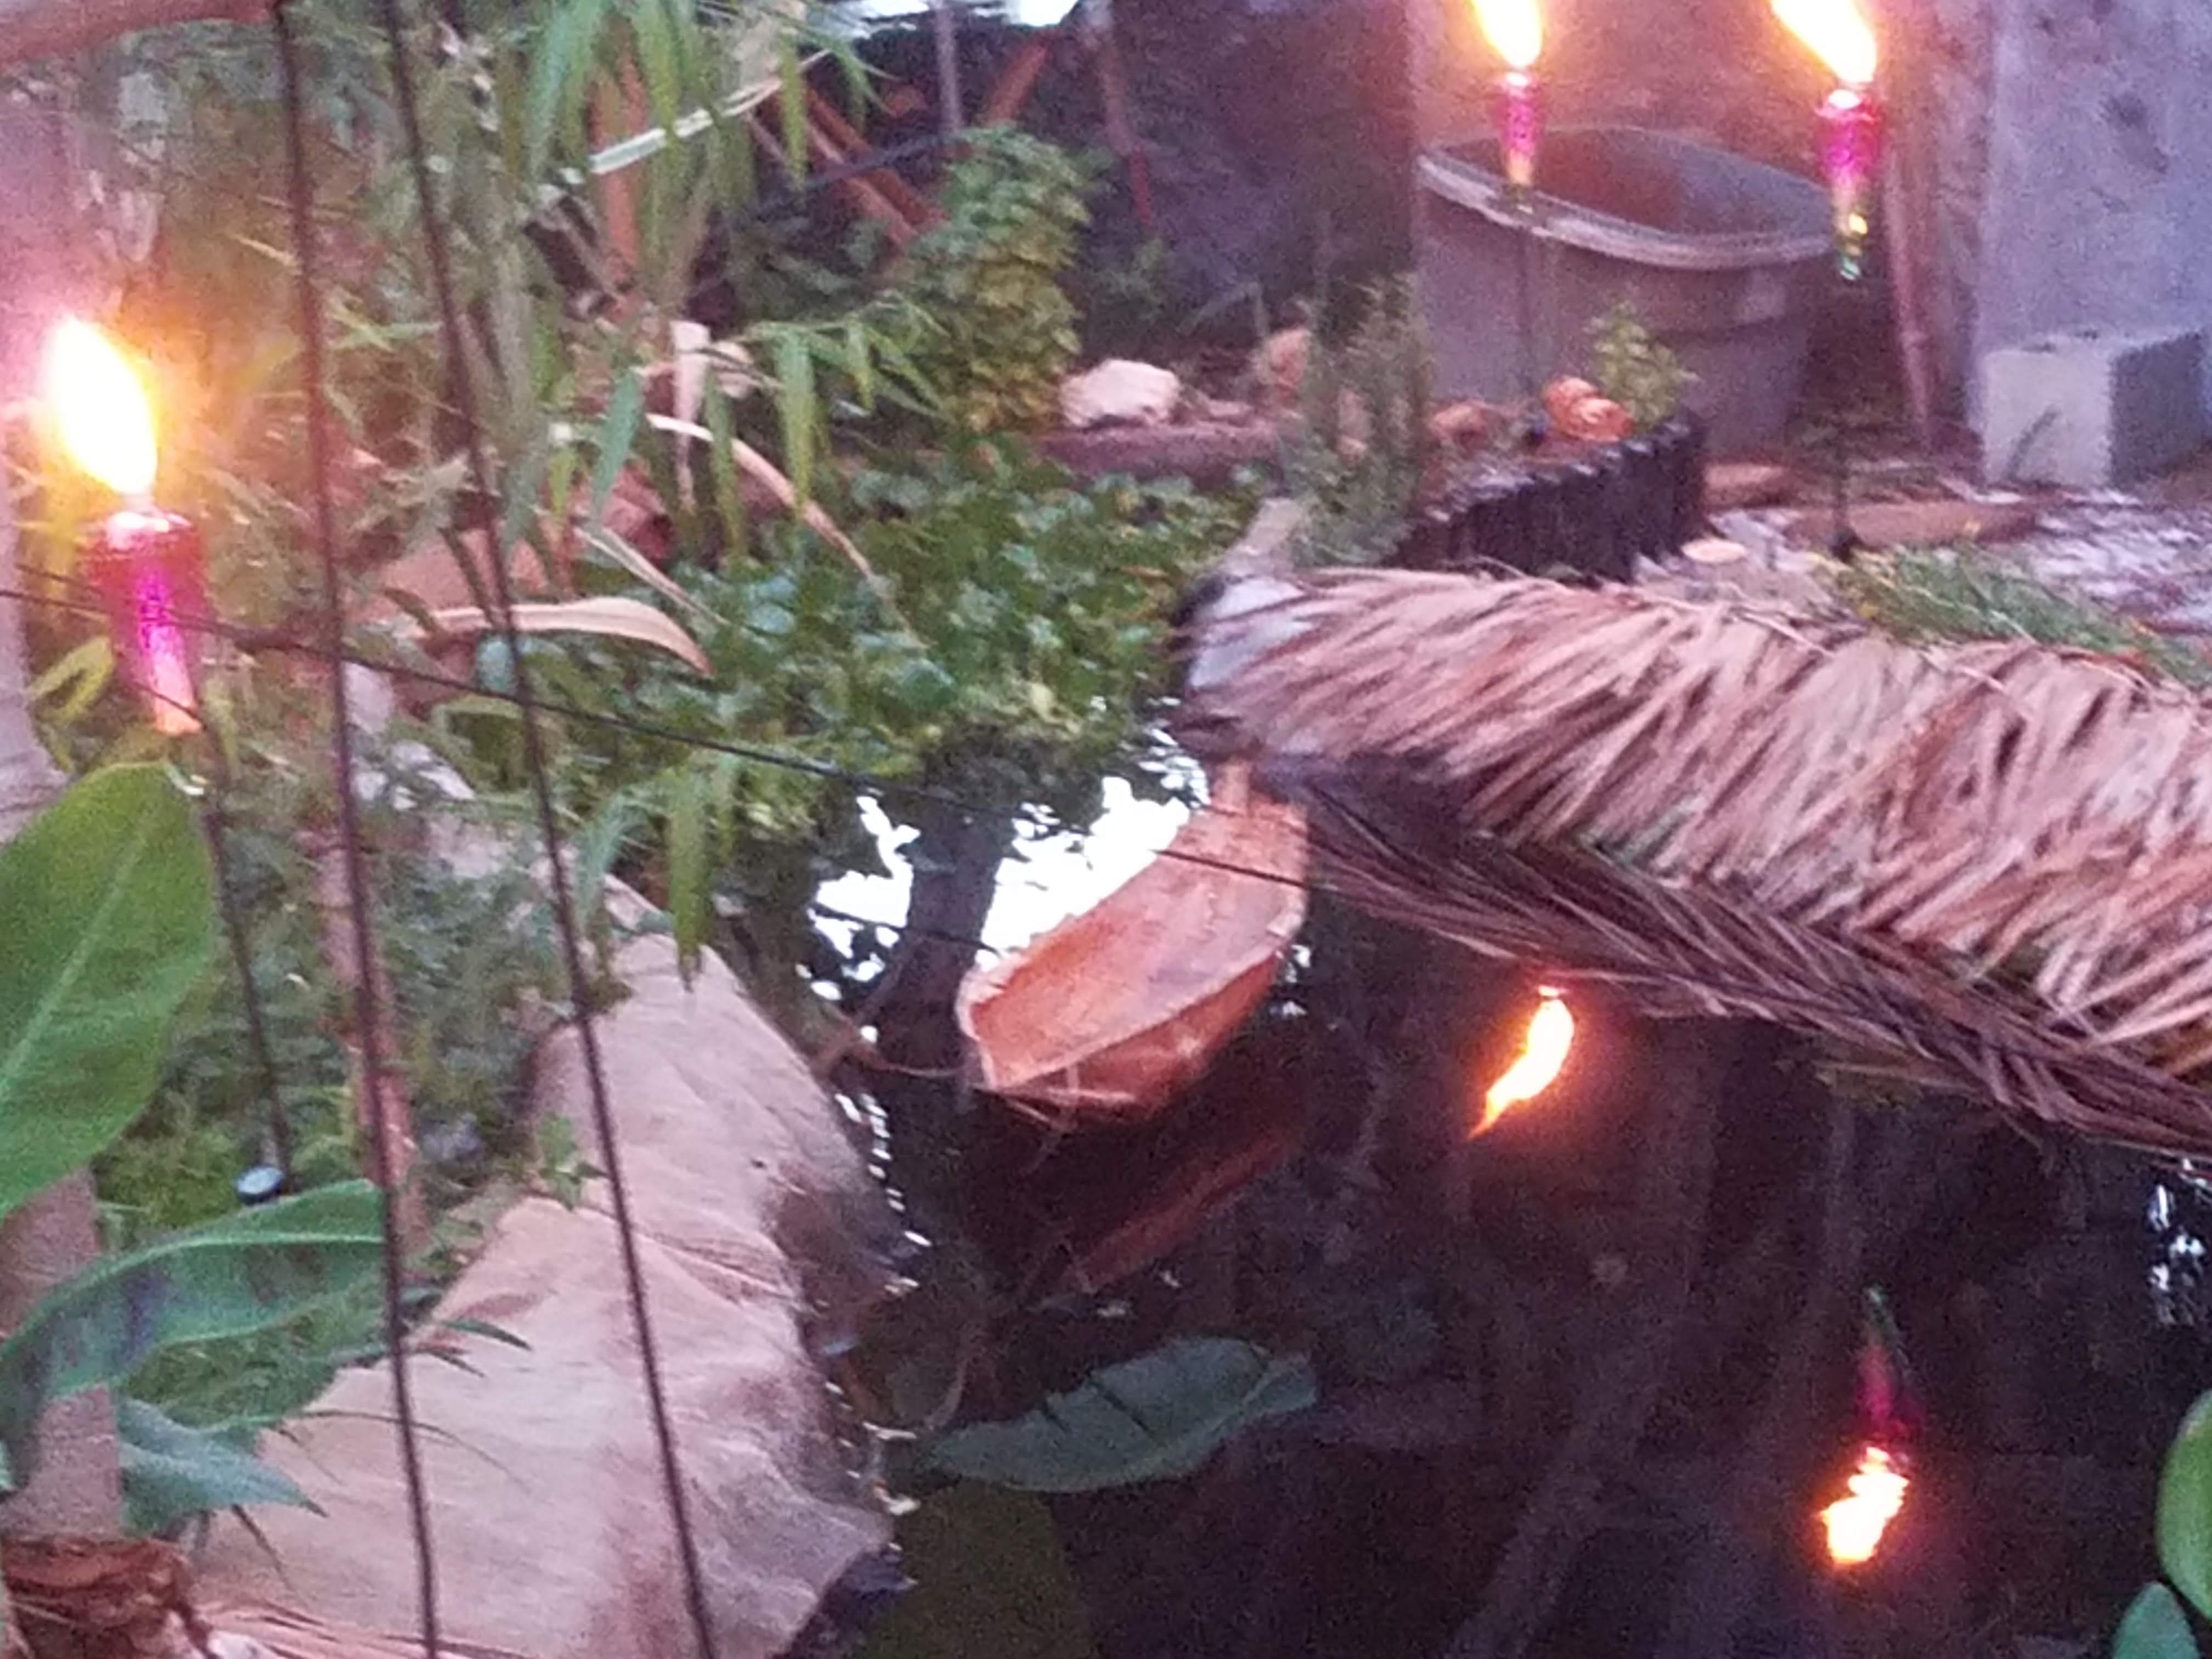
Thatching a roof with Sabal Palm. In progress pics below.


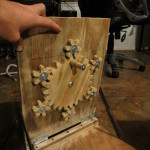
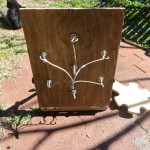
Rope Maker

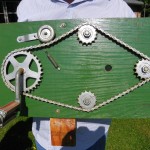
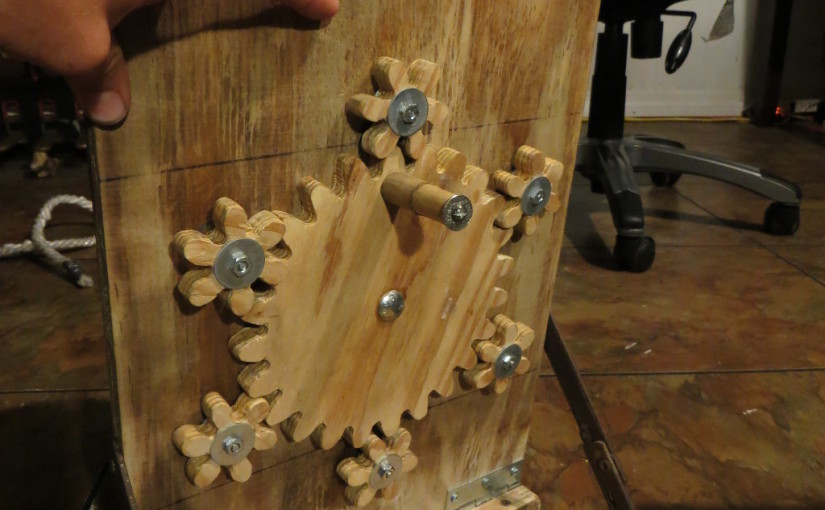
I wanted to make rope like my Grampa Tretter (above), he made a great little machine out of bicycle parts and I wanted to make rope too, so I decided to build my own. The following is a planetary gear, 6 hook setup, made from scrap plywood and a little hardware. You can see it in action here:
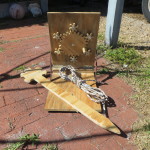
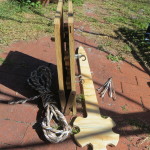
I’ve made plastic bag rope of different thickness, by varying hook count, material thickness or building on top of smaller ropes I’ve made. It all works well, but having different color bags on each hook looks the best :)
For as thick as you can make it, I’ve would never use plastic bag rope for any serious load. With 1/2″ rope, you could carefully lift a couple hundred pounds, but I wouldn’t risk any more then that unless your prepared for it to break (and only for testing). But outside of that, it’s fine for utility rope, things like clothes lines, gardening, tarps, etc…
How long will it last?
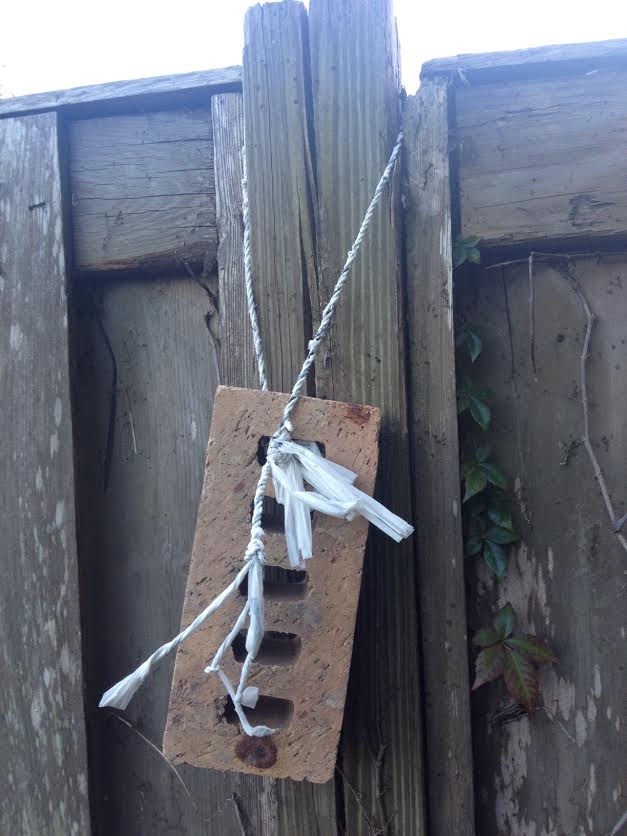
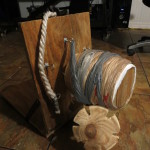
If you’ve ever picked up an old plastic bag and had it crumble apart in your hand, you might wonder how long the rope will hold up for. To test this, I’ve been hanging a brick by a very thin rope I made in full sun since June of 2014, as of now it’s been 6 months. Whenever I think of it, I go outside and yank on it to see if I can break it. It’s still very strong. My best guess is the majority of the surface area of the material is twisted up inside and protected. But I’ll keep checking it and update this page if things change.
UPDATE, DECEMBER, 2015:
The rope test above failed. I pulled on it and it broke. I hoped it would last longer, but now I know :)
Knots for Fun
I’ve been quite interested the old knot work and stylings of the marlinspike seamen. I tie knots for fun on a regular basis. Here are some pictures of a few things I’ve worked on recently.
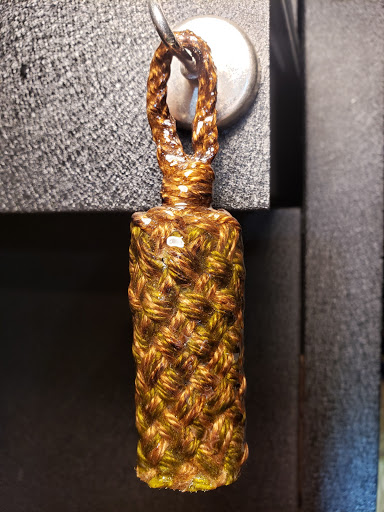
The following is a fish scale wrap, snake knot handle with a 5 bight, 7 lead, 3 ply turkshead in the middle
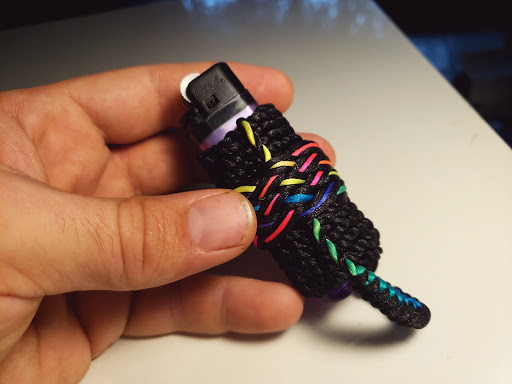
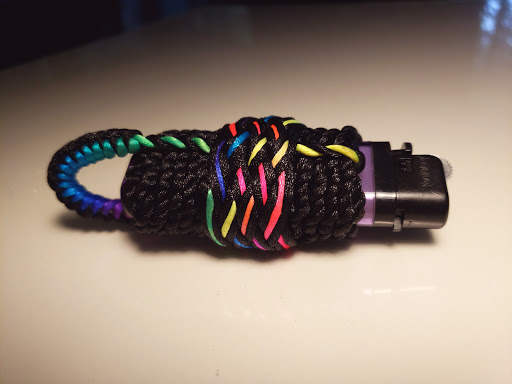
The is a wrap made for a lighter. It’s unfinished. But I thought it looked nice at this stage. It’s starts as a sinnet, then to a mathew walker and finally a standing turkshead with an epoxy layer on top.
This was simply practice. I wanted to tie a herringbone pattern and I was curious how tight I could get the wrap around some PVC. I wanted to know if I could twist the grip off by hand. I found out that after heaving on each strand I couldn’t get it to budge.
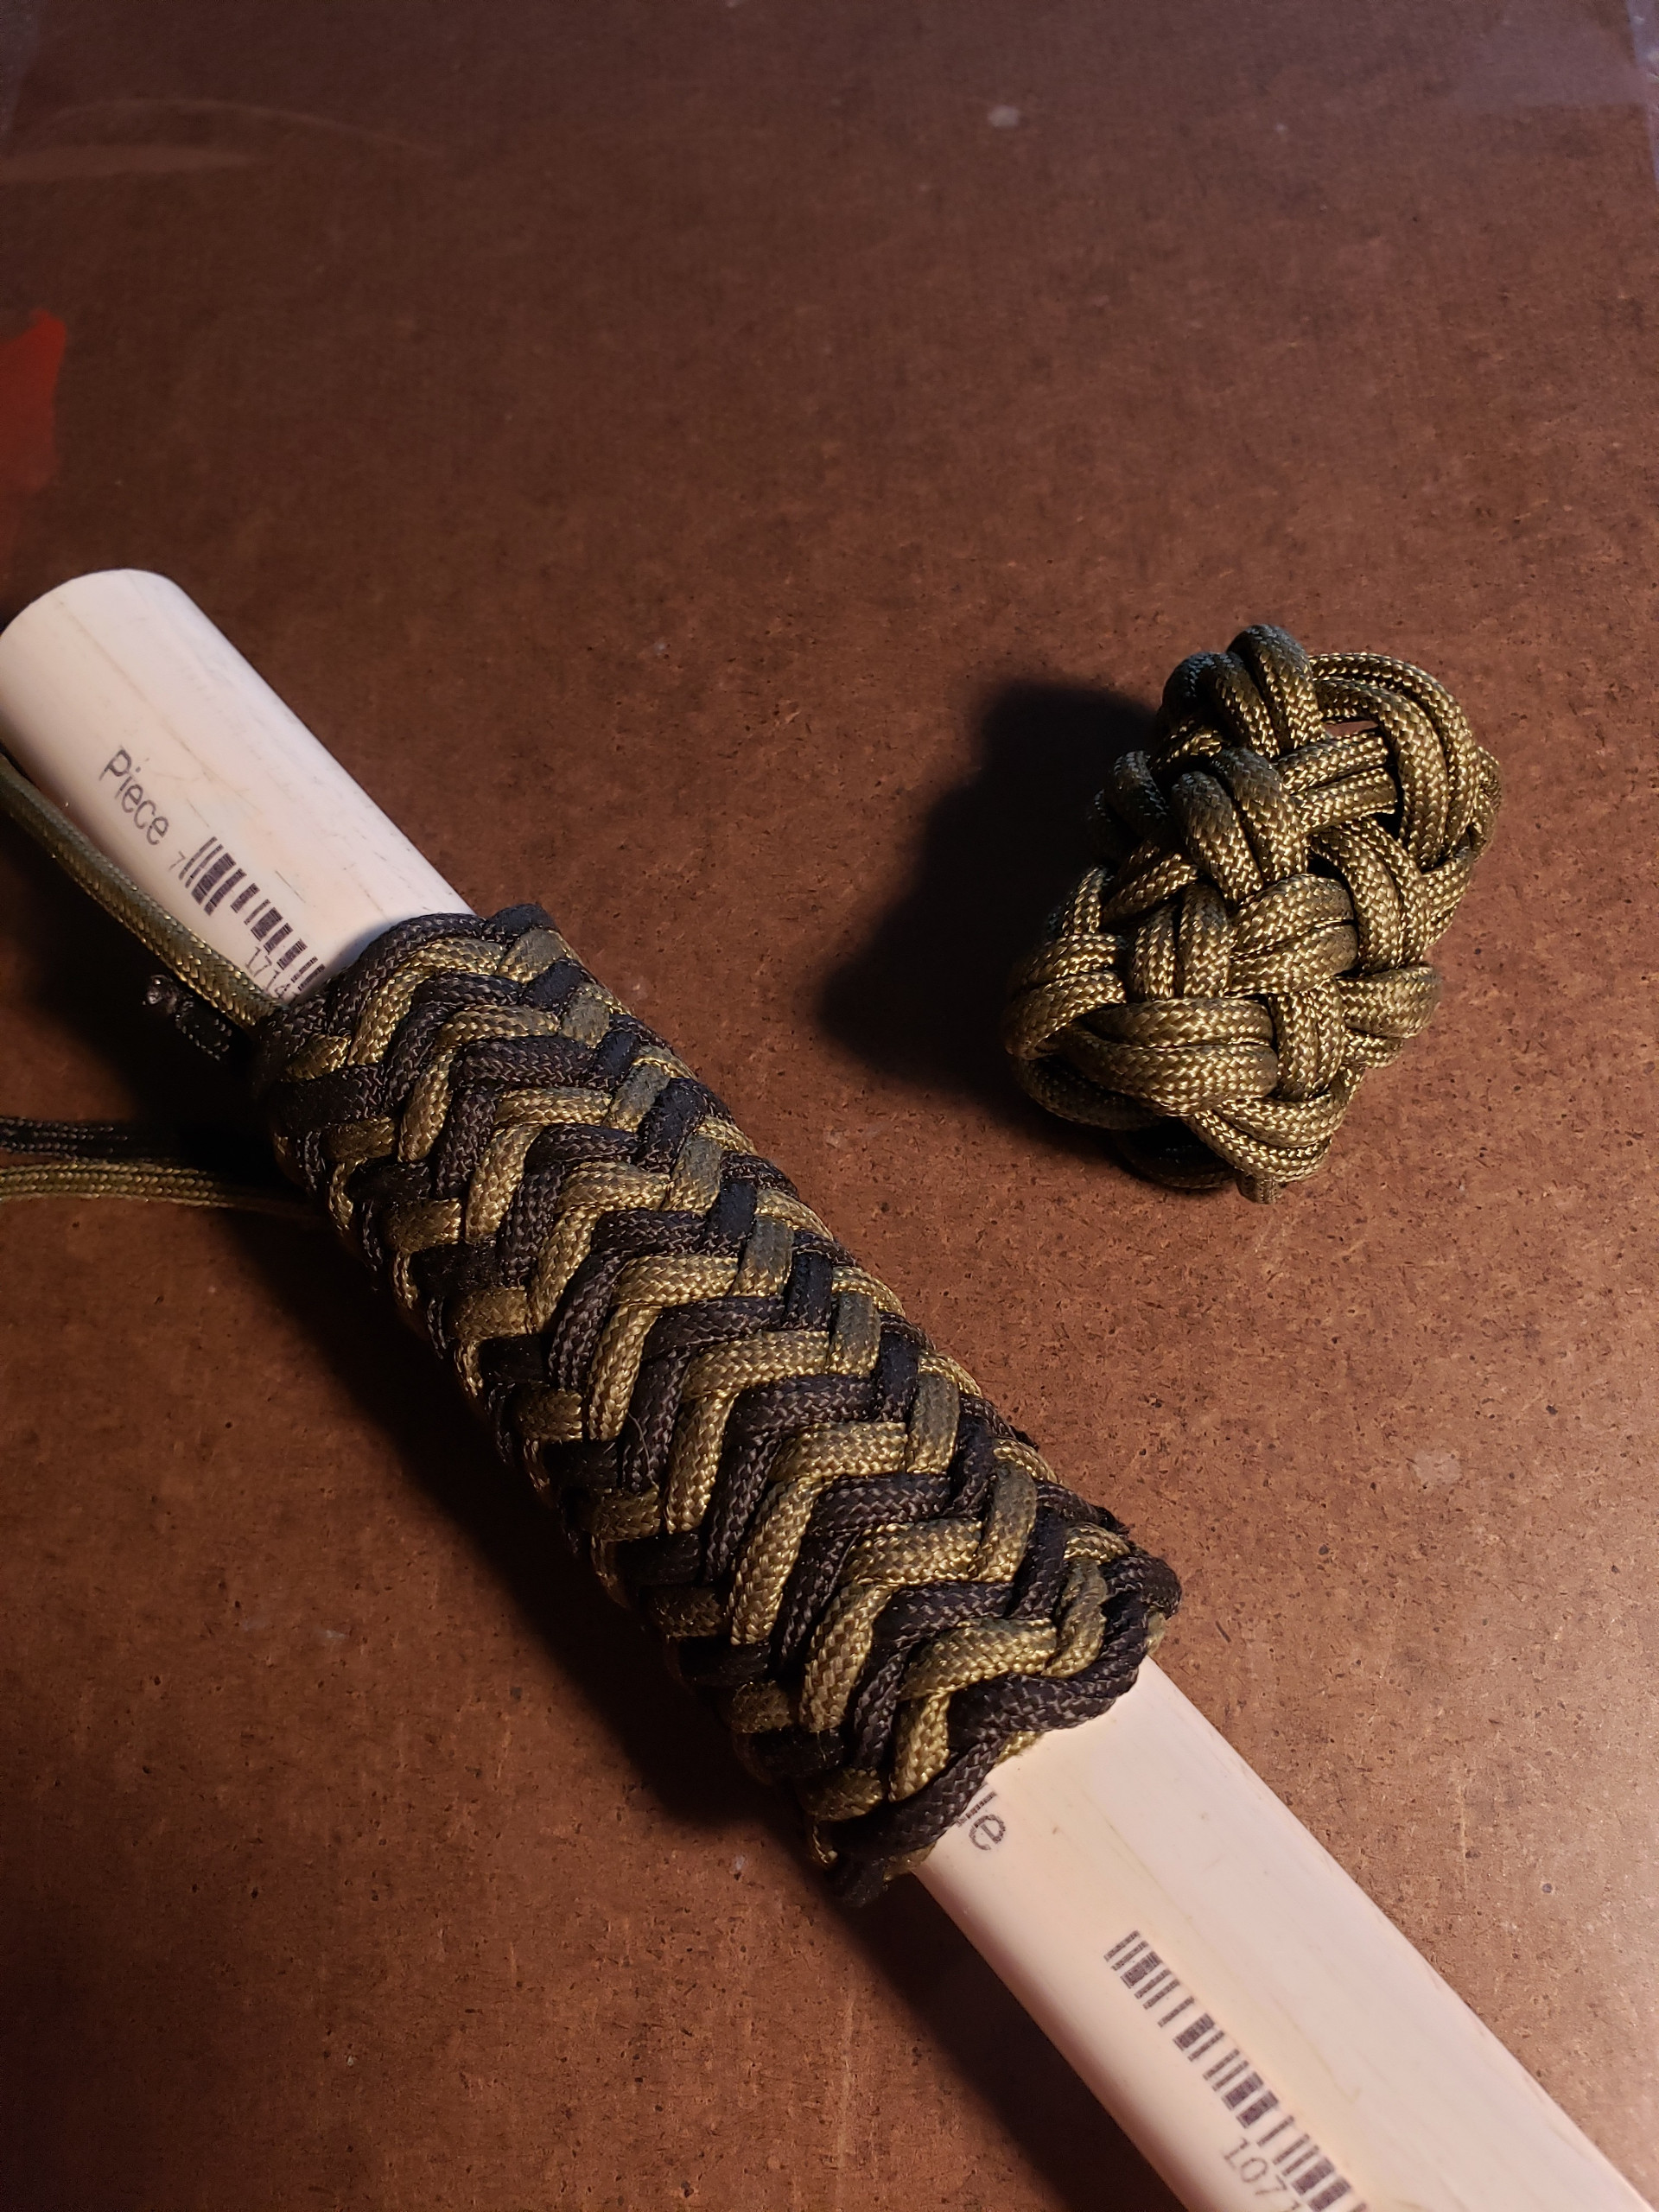
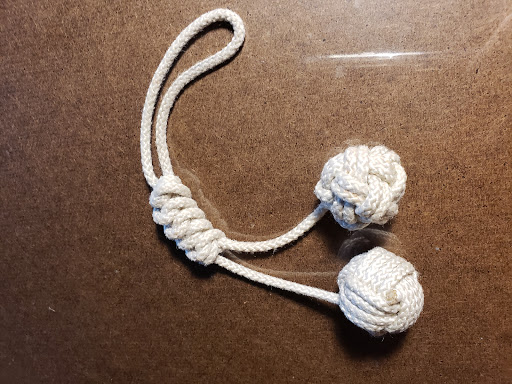
I made this to compare a monkey’s fist and a globe knot of the same size.
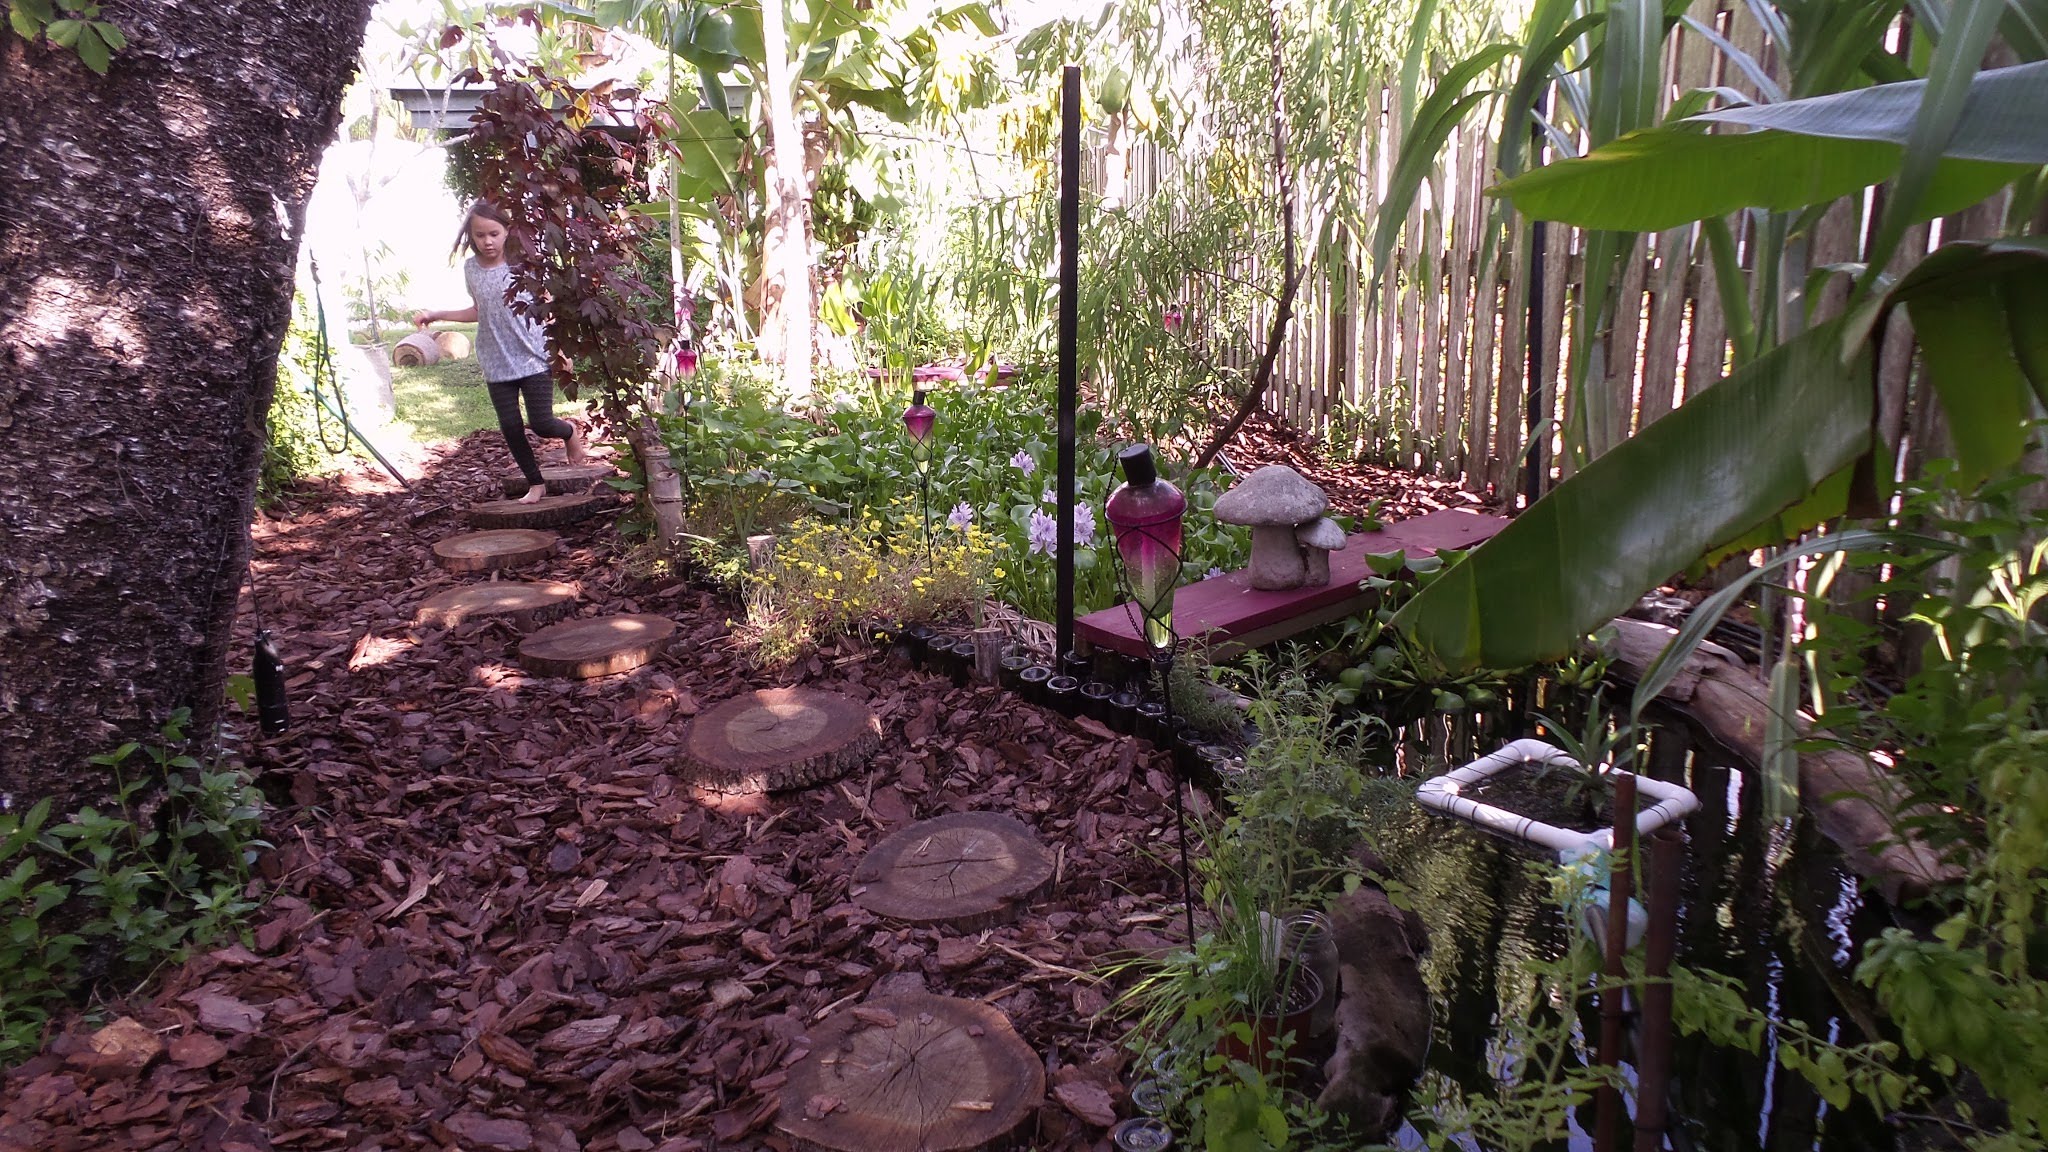
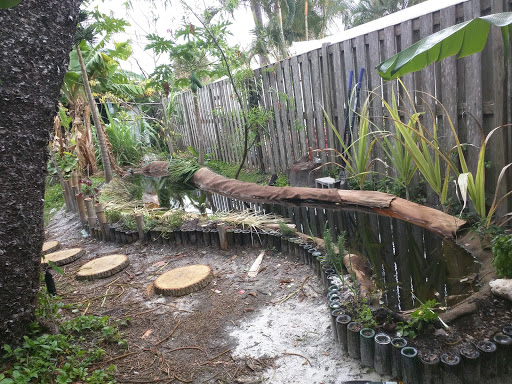
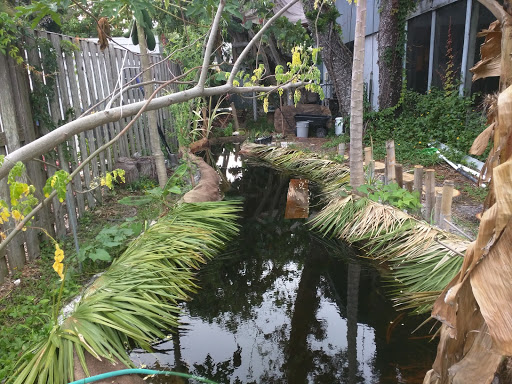
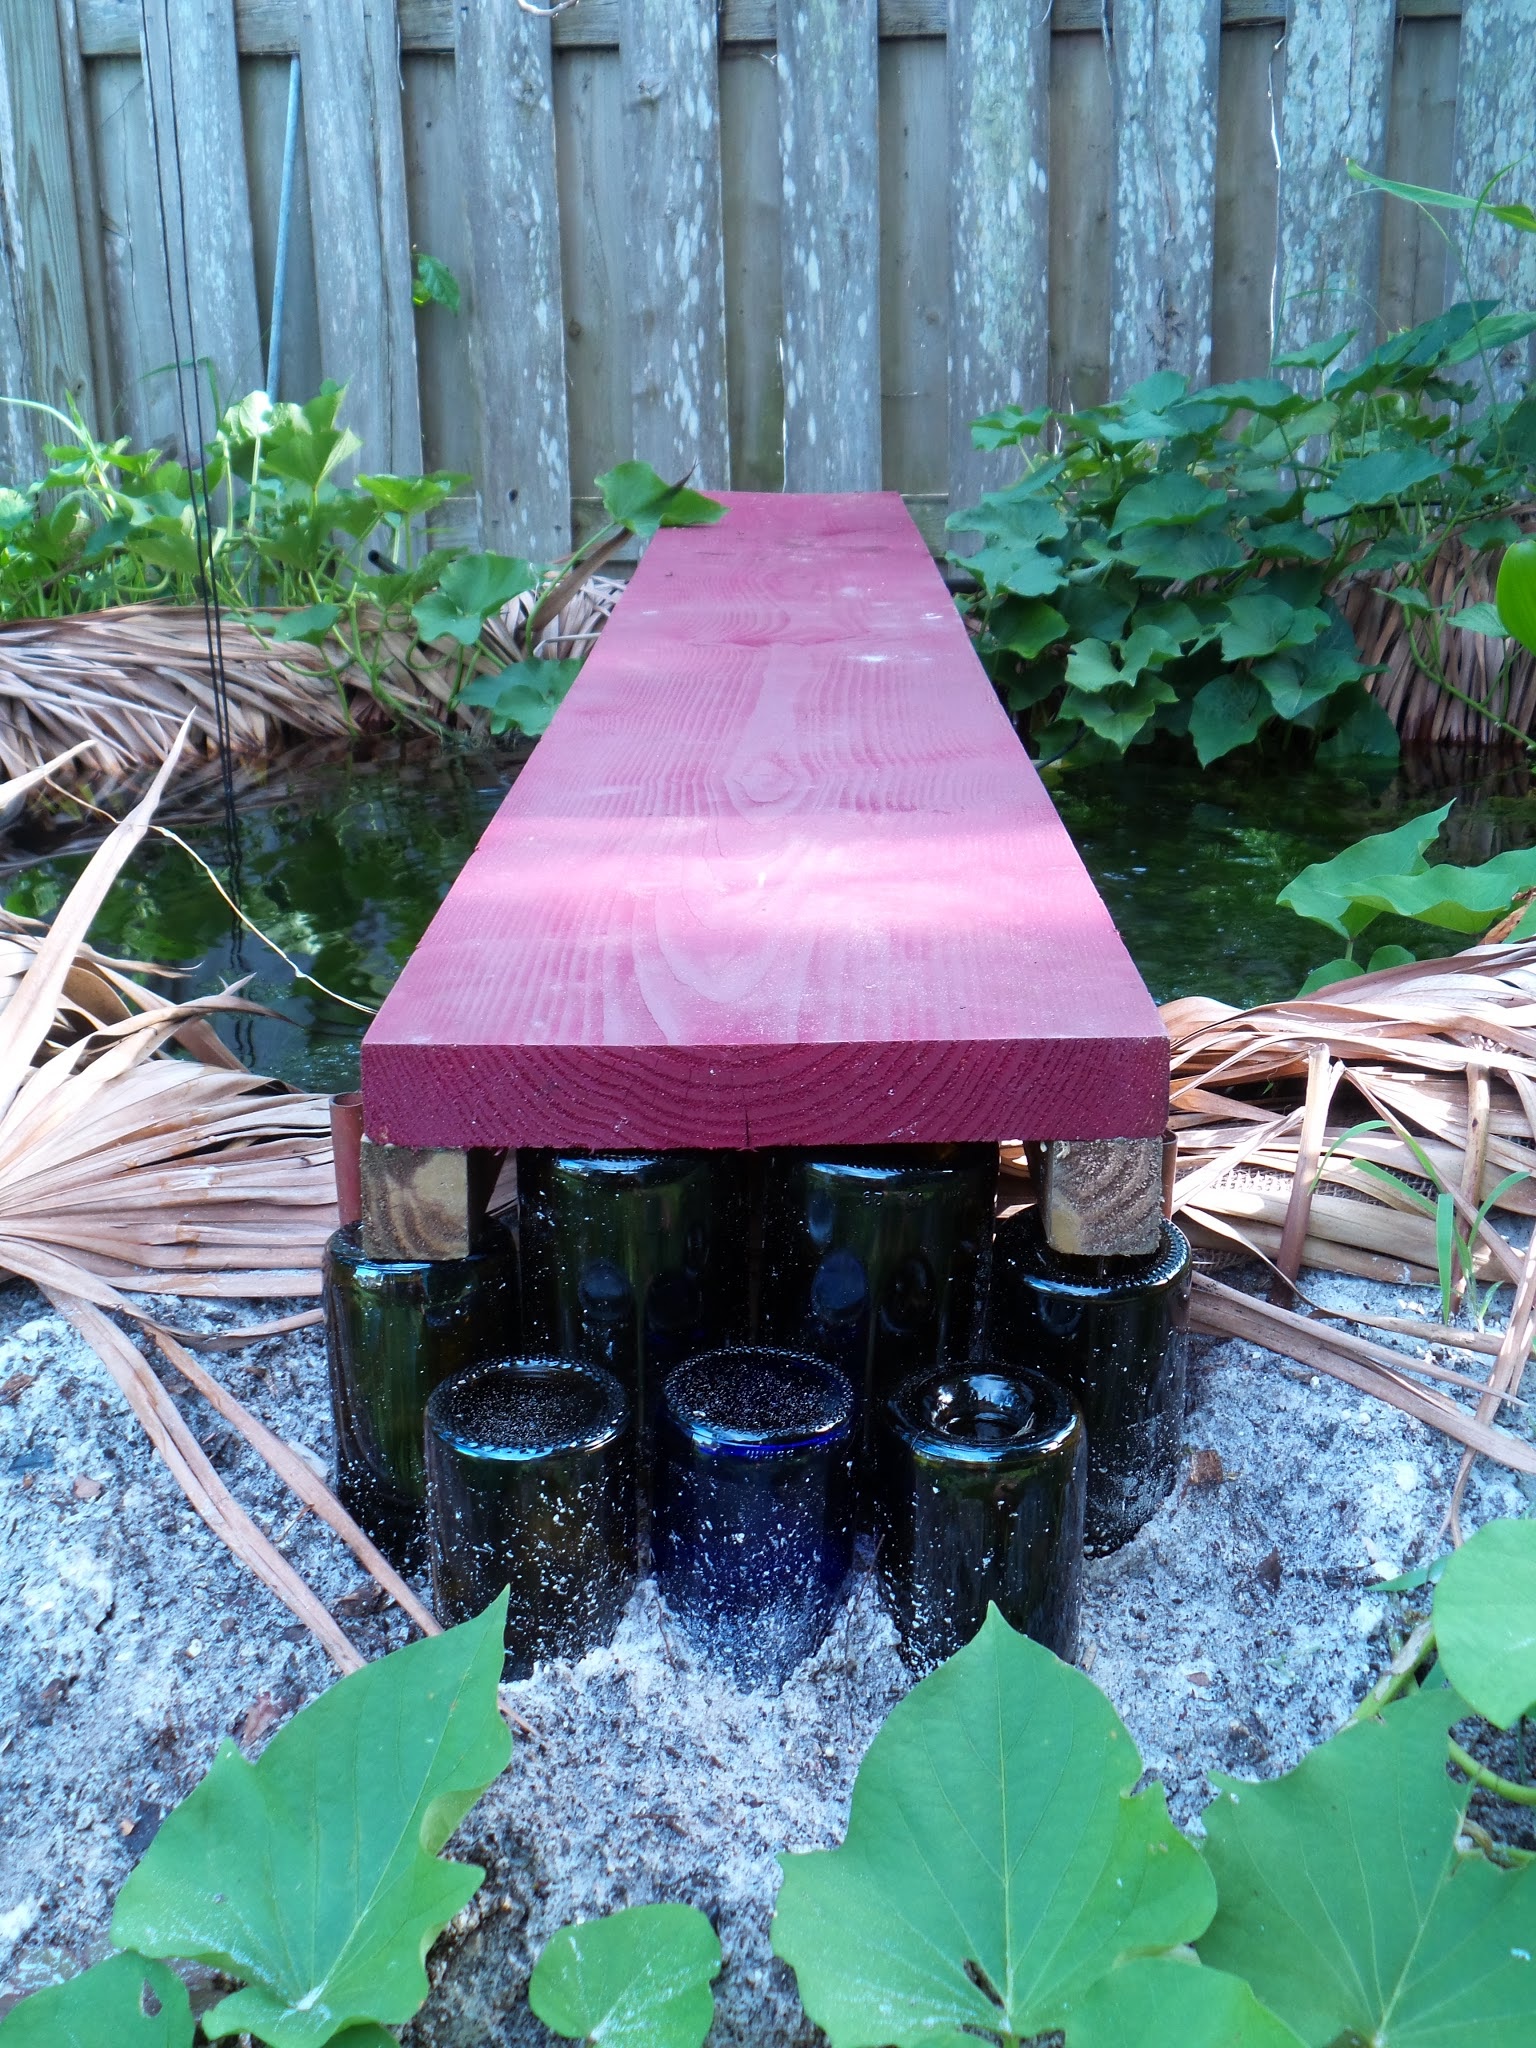
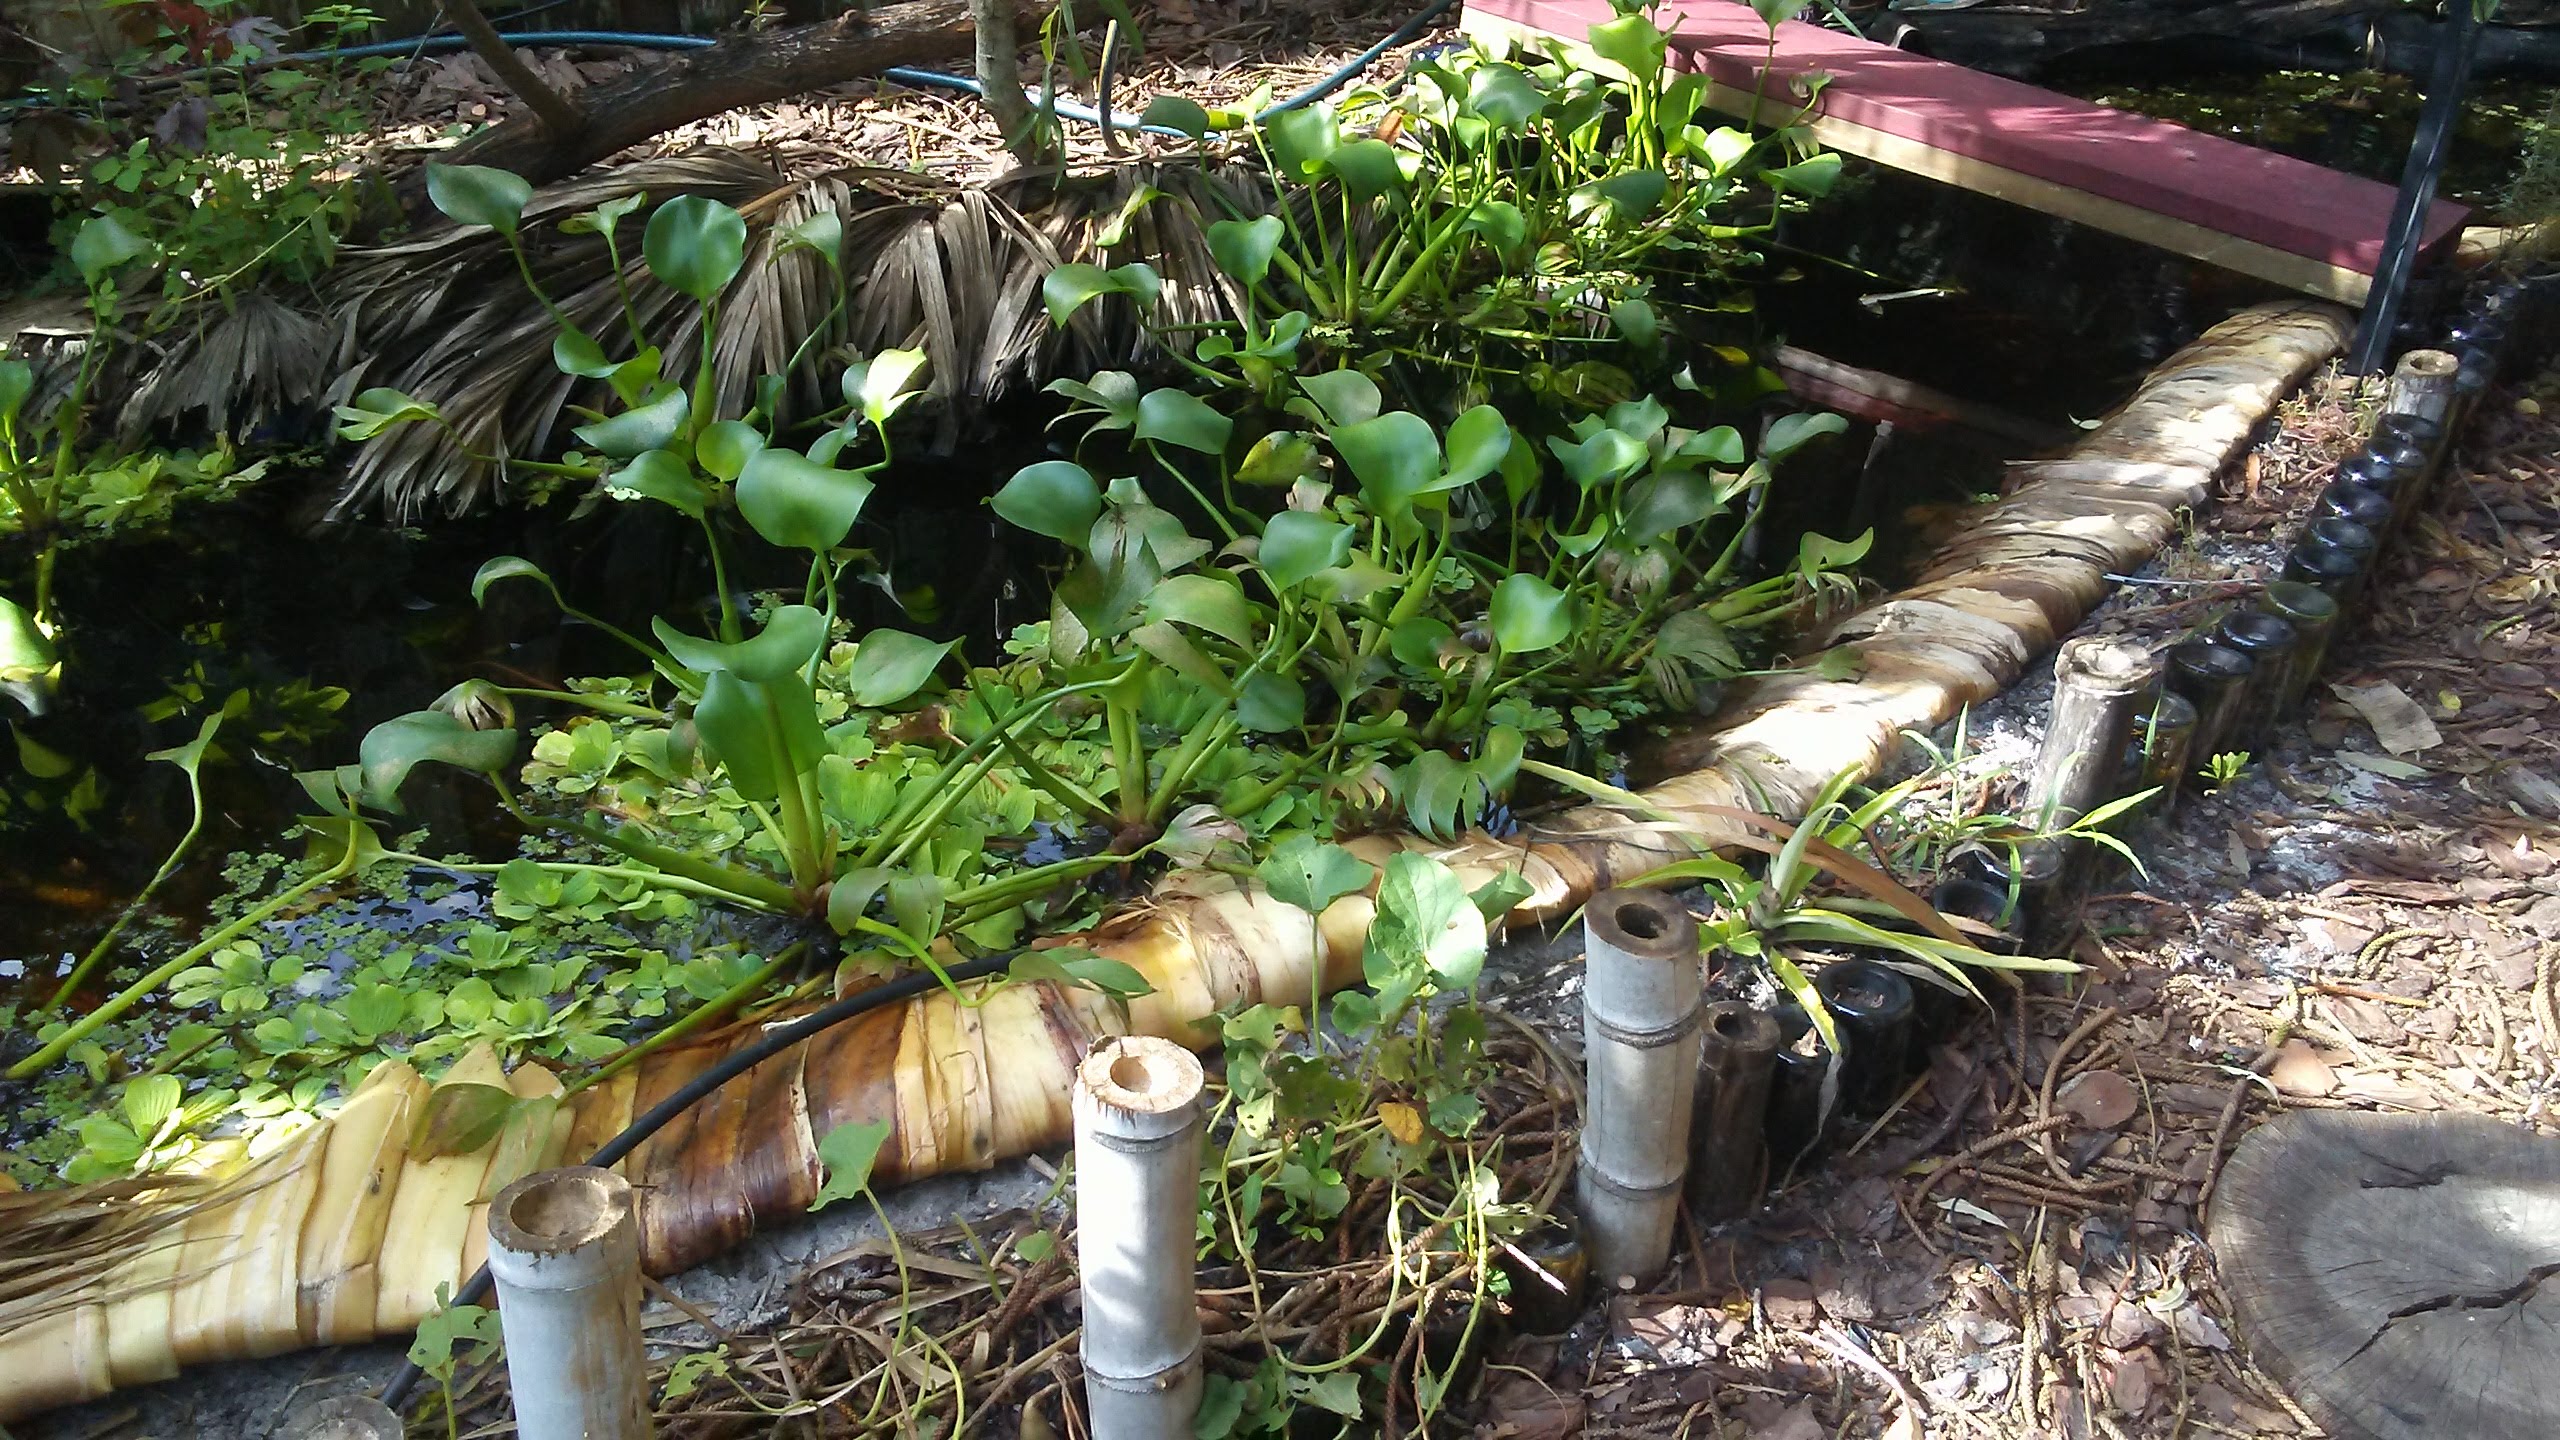
Pond
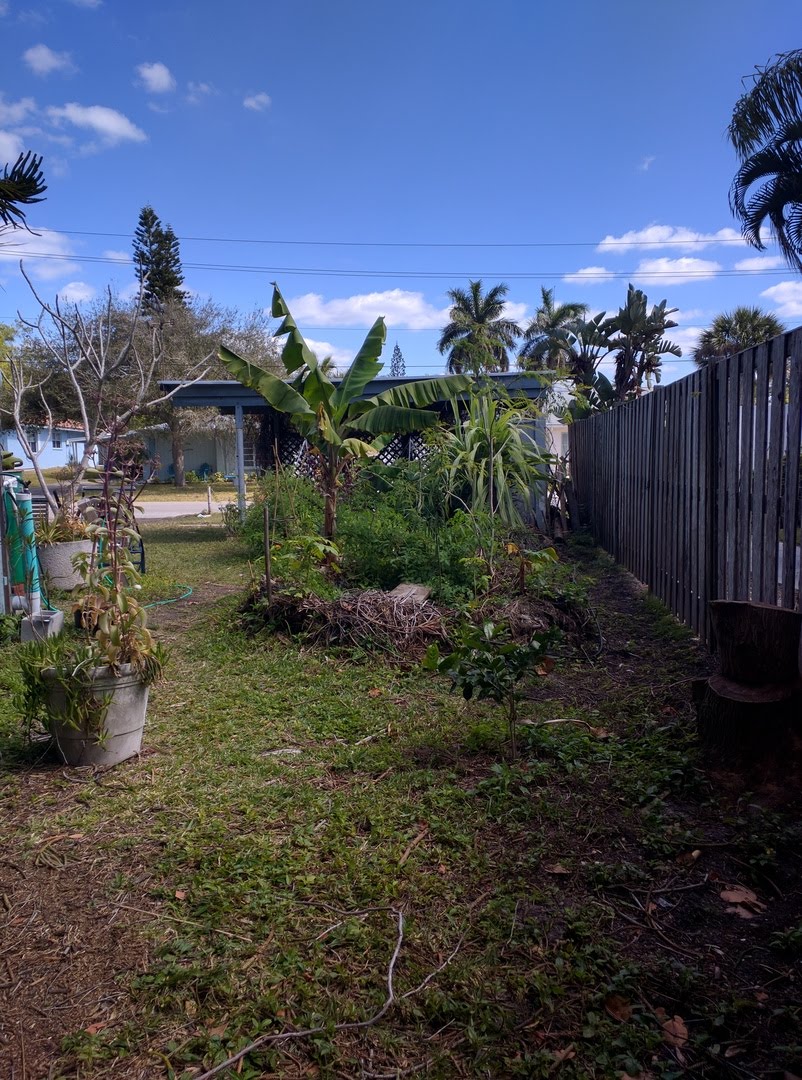
Here it is. My northern-most hugelkulture bed was refactored into a pond. Here’s the before pic:
Here’s what it looks like after.

Here’s a video of my pond more recently with my aquaponics bed:
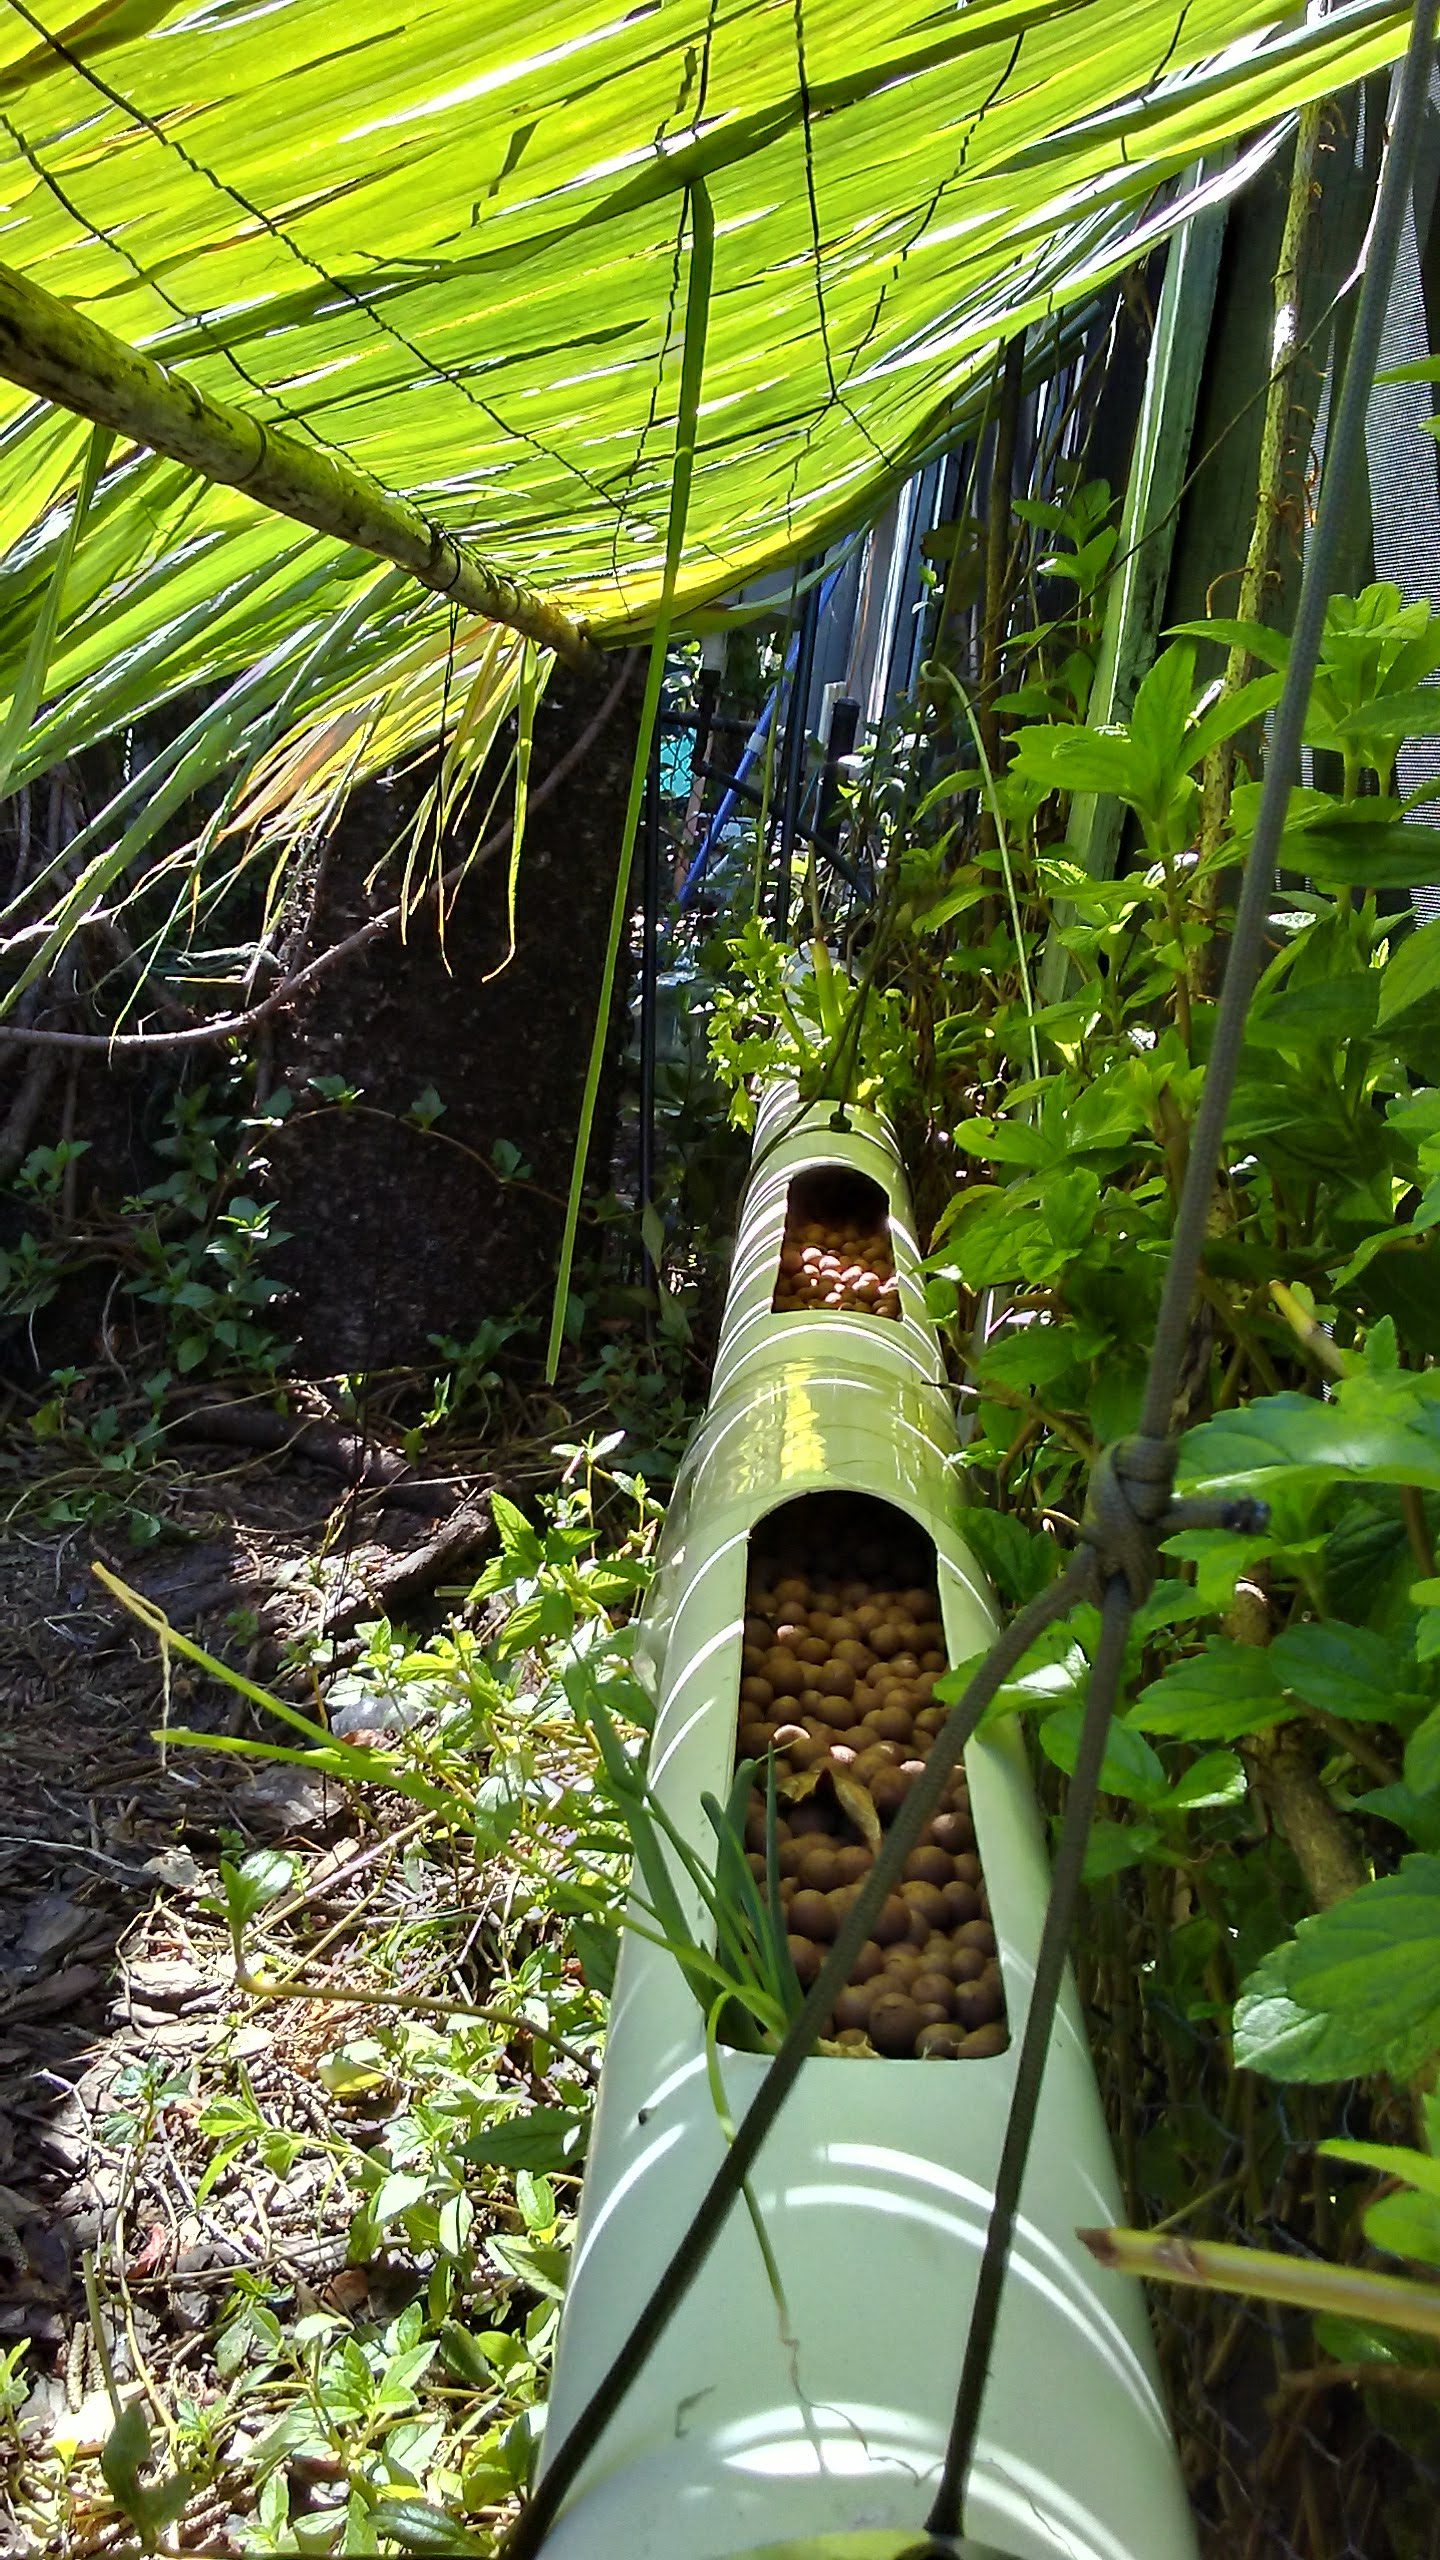
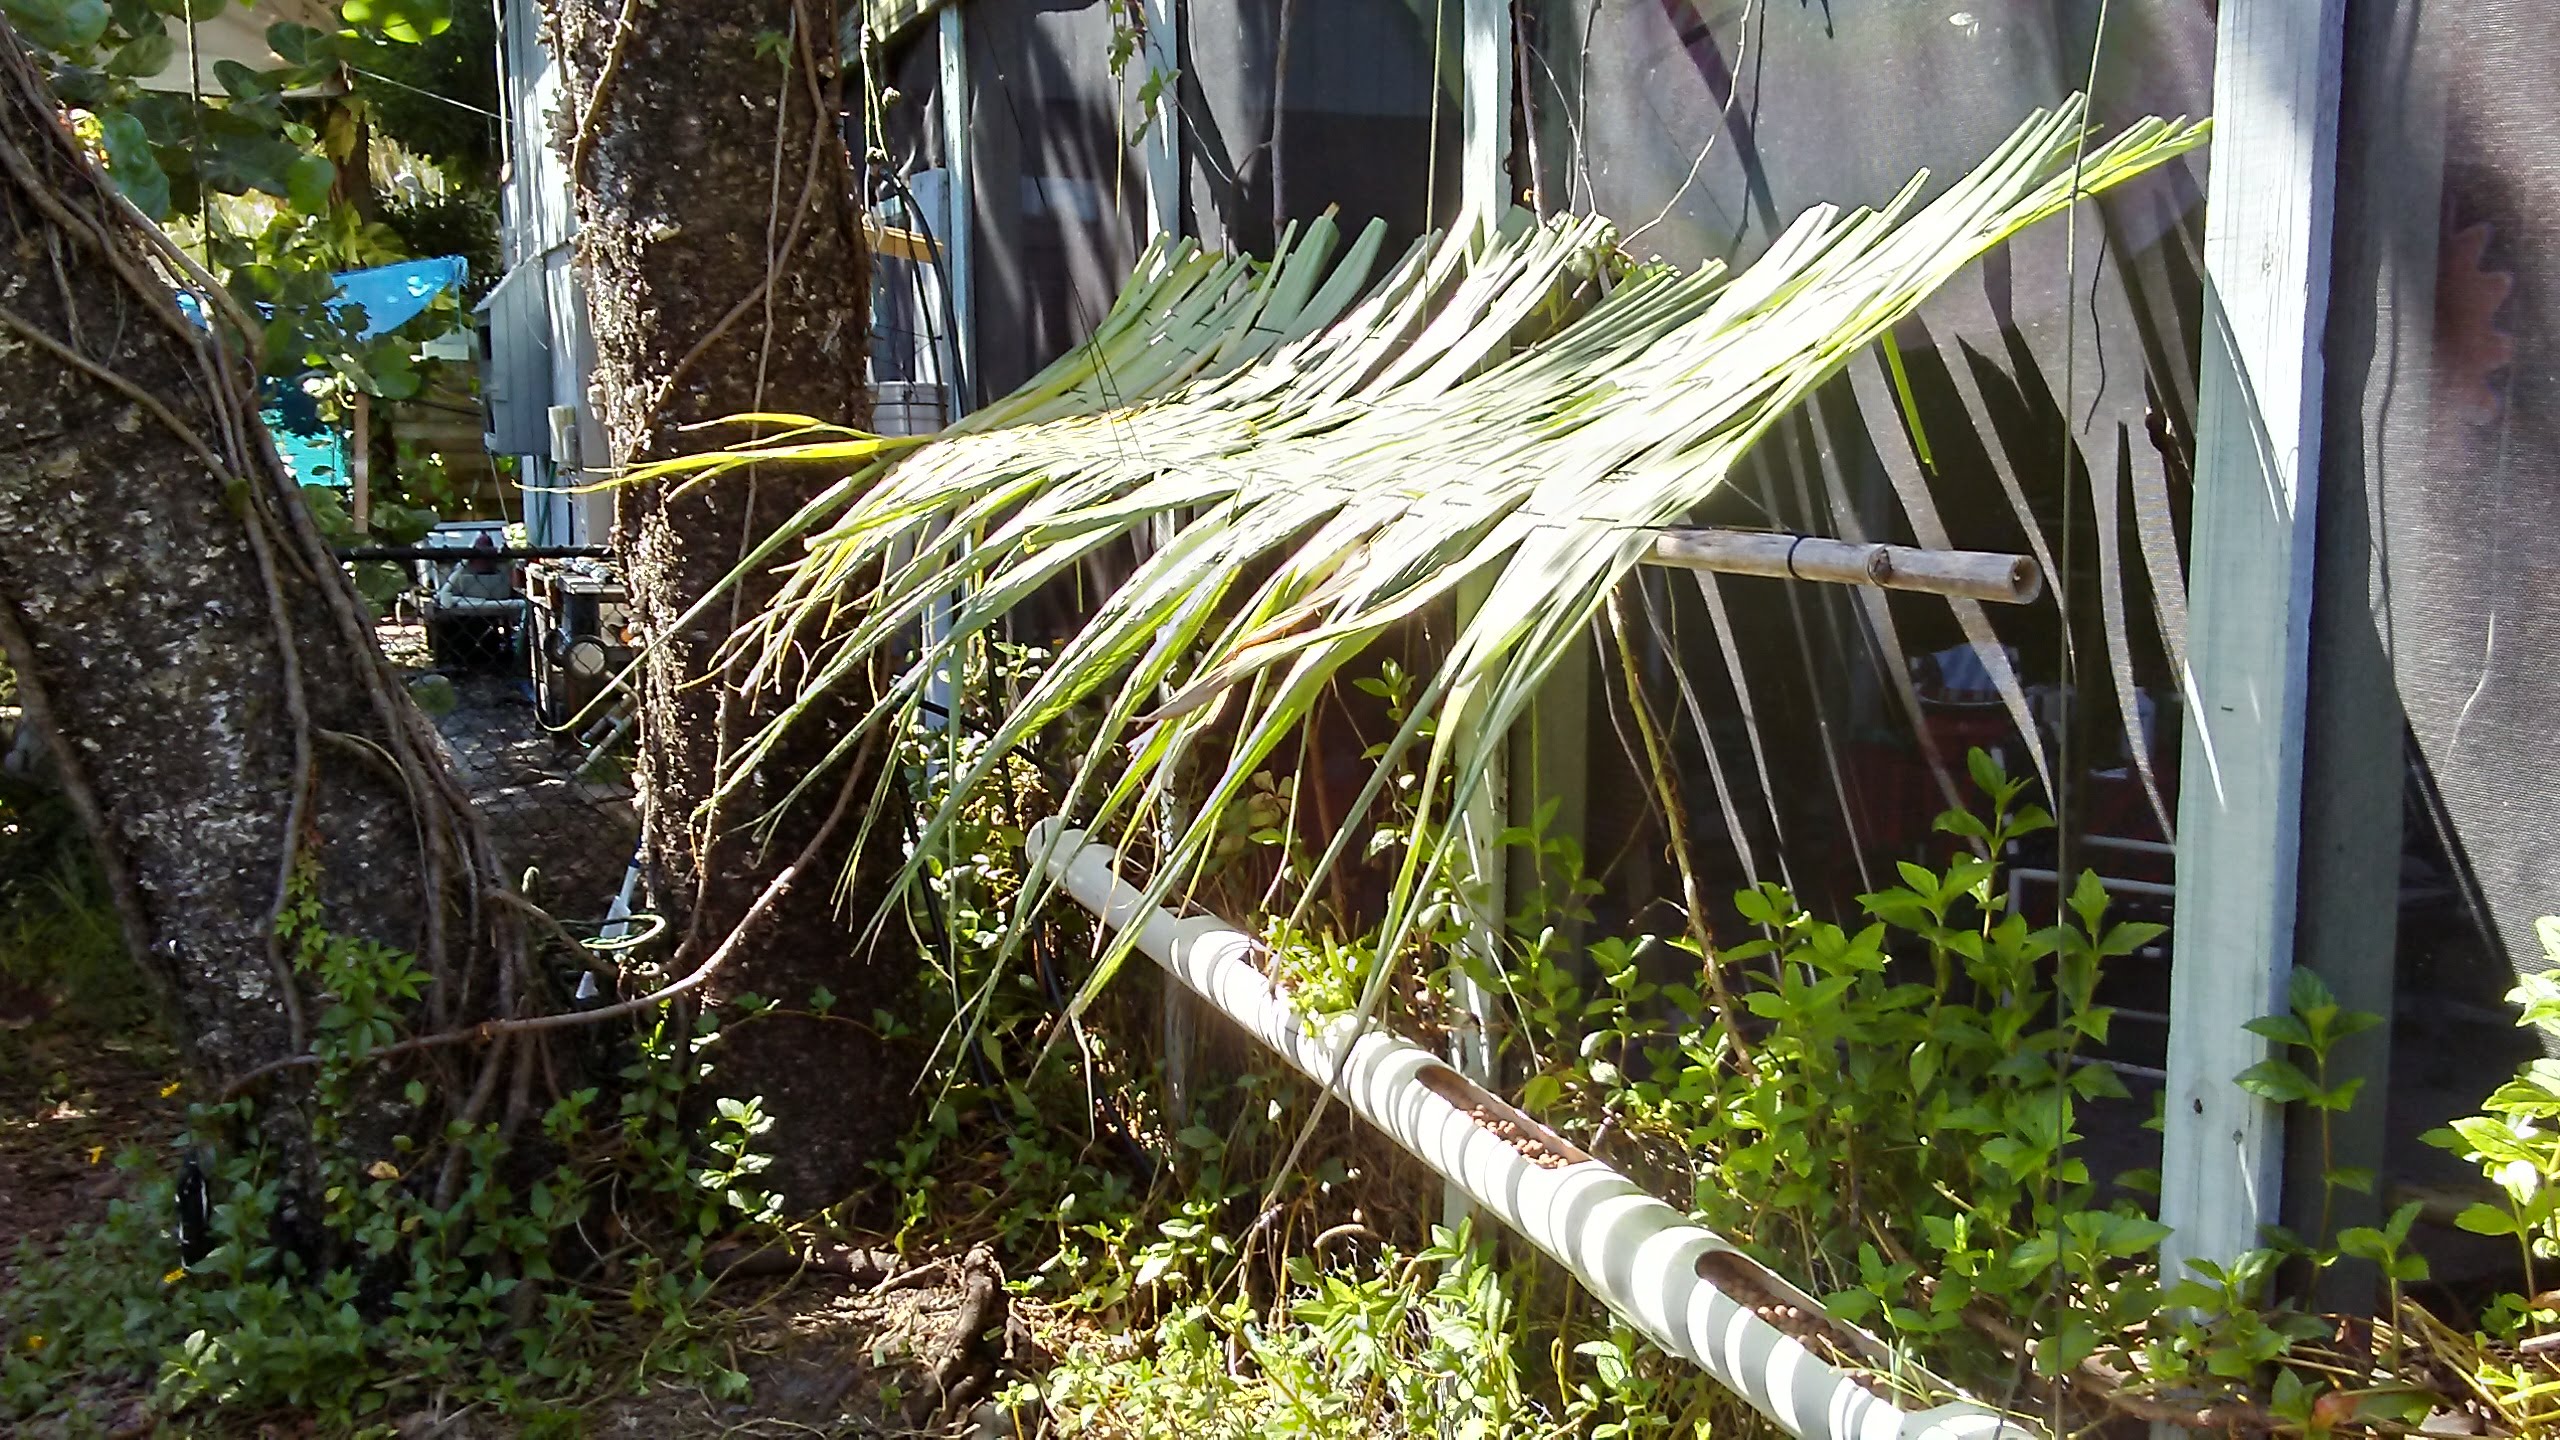
I didn’t want to import rocks and was curious what I could use around my area, so I experimented with burlap & with different parts of varying types of palms: cabbage, golden, royal, saw (frond, stem, sheath). I settled on saw palmetto for the first couple years.
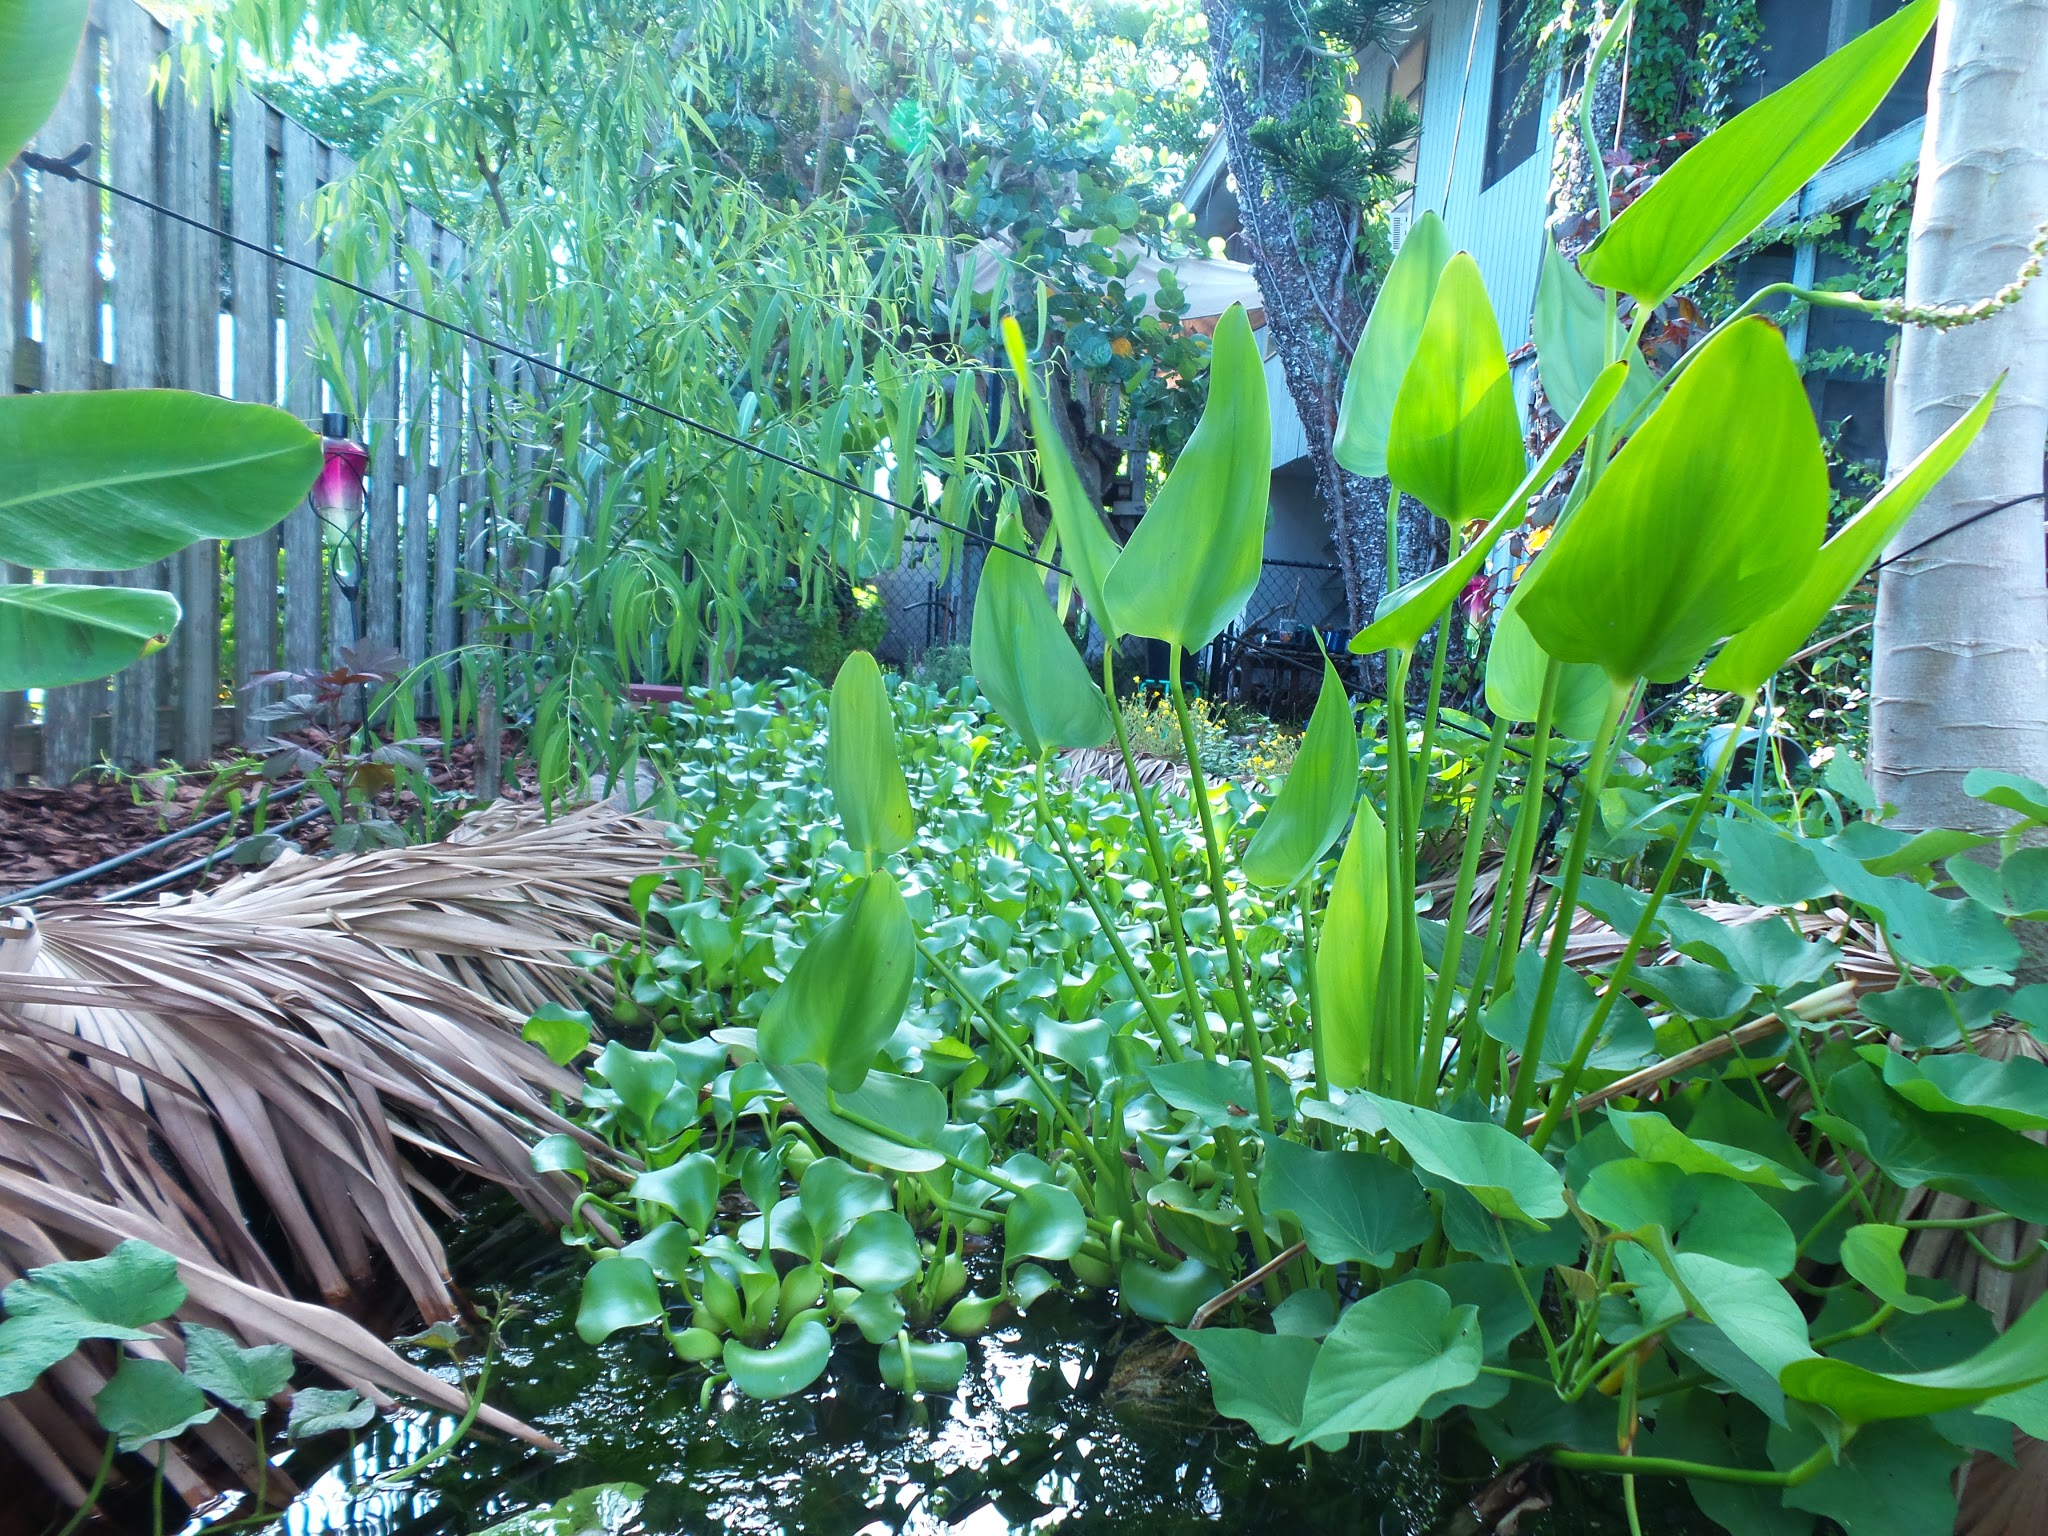
I also decided not to use a pump for the first year, the pond was populated with water hyacinth for nutrient removal, hornwort for oxygen, and guppies for mosquito control. I’ve enhanced the pond over time with a solar pump that moves water around during the day (supplementing oxygen) and tops off a rain barrel which drains into a garden bed over night (supplementing nutrient removal).
I wish I could post in-progress pics, but my phone died before I had a chance to back them up. The following are pictures starting from just after I dug the hole and put the liner in:

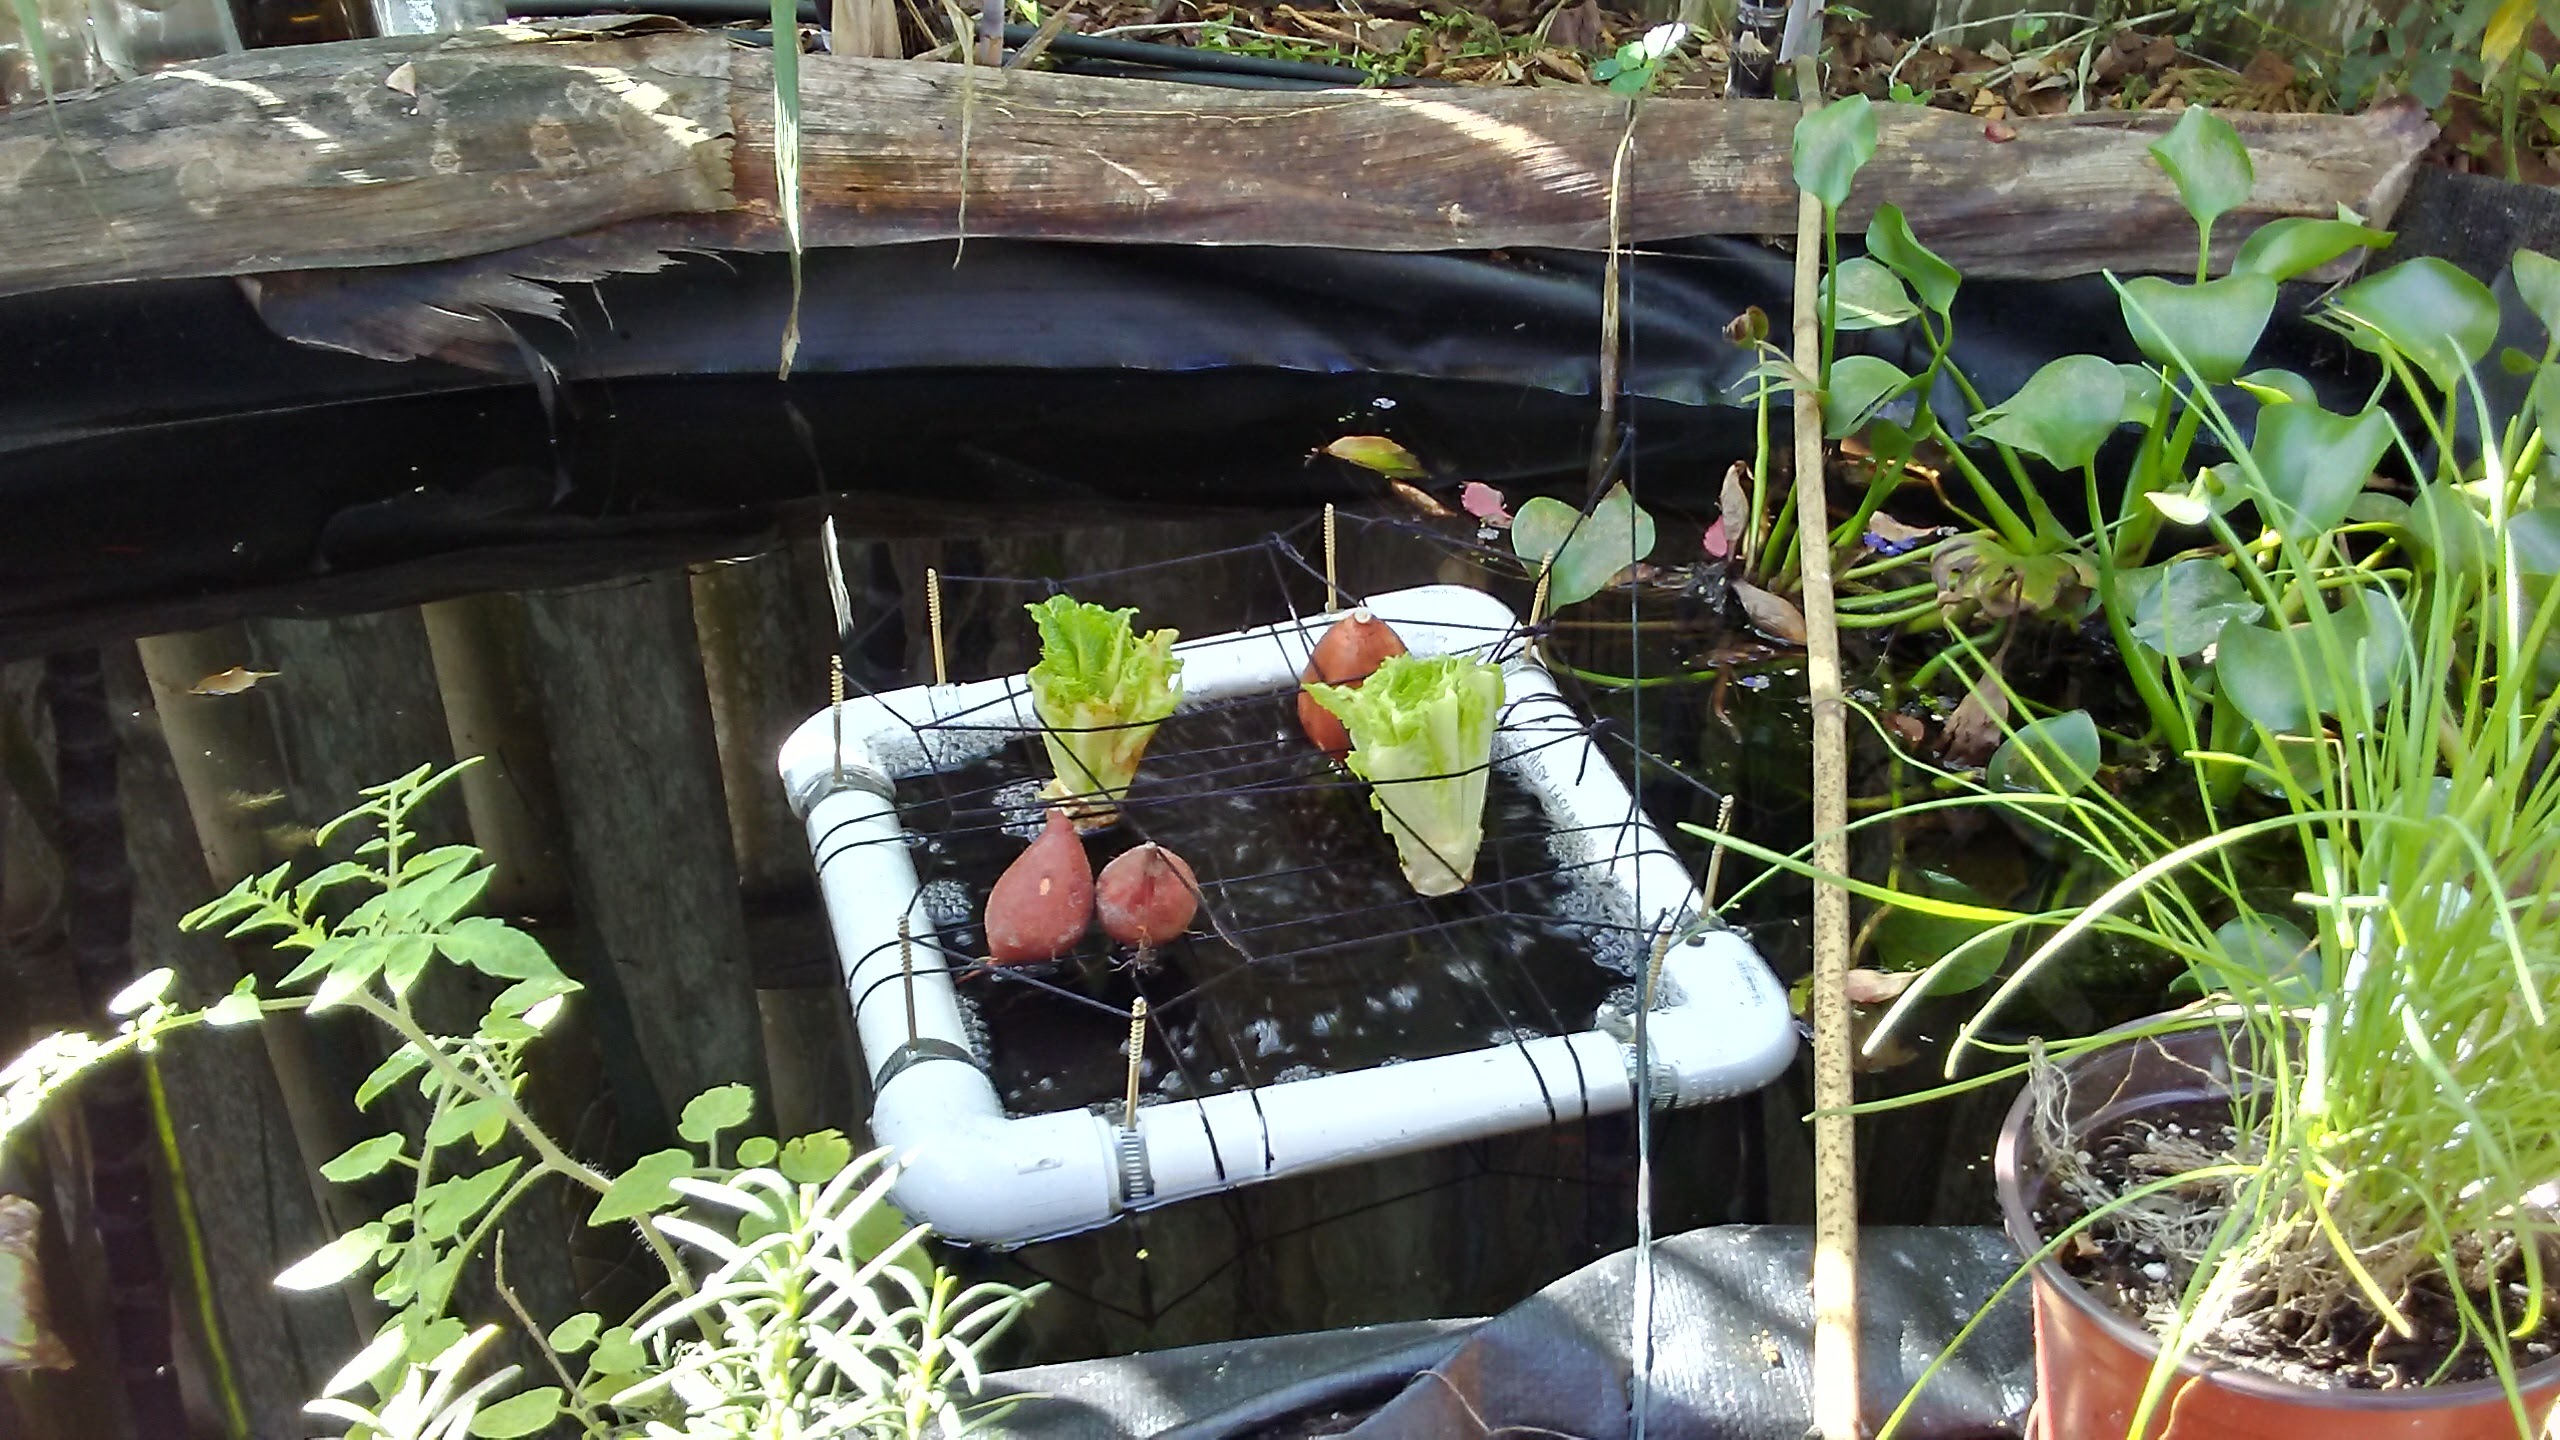
Playing with aquaponics: This little raft worked well for sweet potato and rooting onions but my the romaine grew for a while then got root rot. I now have an ebb and flow bed I’m trying. You can find that here:
Water powered timer for grow bed
Within a half year, water hyacinth had completely covered the pond. I net out overgrowth and mulch/layer on them on the beds surrounding the pond.
After a couple years the thatch disintegrated and I started using banana stem. It’s a easier to tuck under the liner because it’s flexible (after you roll it) and it’s more locally more renewable for me too; since banana is growing next to my pond :)
Swiveling Solar Panel
I sized my solar panel to my pond pump. The pump is a brushless motor pump which uses 54 watts max and can pump a head of 33 feet. My solar panel is 100 watts and runs the pump well (even a little on cloudy days) and better yet when the panel is facing the sun.
Initially I wanted to track the sun and I was hoping to make a water/drip powered solar tracker, but I ran into issues at certain angles with my design. Here’s some pictures of that:


I abandoned the above project for something I can just turn by hand. Here it is:
If I can use rope and knots in a project, I probably will. This panel is suspended and adjusted by paracord and friction hitches. Here’s some pics of the build:


Water Powered Timer
So, I’m playing around with a gravity fed Aquaponics bed. Most ebb and flow systems I’ve seen use either a bell siphon, or an electric/mechanical timer. This idea is a little different, it uses a Shishi-odoshi (“scaredeer”) or sōzu to start a siphon which drains a 5 gallon bucket of water into a grow bed. The timer is governed by the flow of water into the scaredeer (the 2 liter bottle).
Some background:
I have a fish pond, a rain barrel and a gravity fed water timer. The rain barrel is 10 foot off the ground and a solar powered pump replenishes the barrel with pond water while the sun is out (like a water tower). The barrel, in turn, drains into my water timer overnight and on super cloudy days.
The aim of the timer is to be able to slow down the water flow as much as needed and not worry about stalling the siphon or fully draining rain barrel.
Here’s what I got so far:
")

 bed")

Here’s a video of it in action:
Here’s the sunshade I made for it out of sugarcane leaves. I’m thinking of re-making it out of banana later on. We’ll see.
Roof Top Rain Barrel
So this is just a rain barrel placed on a reinforced carport roof top. It’s about 10 foot off the ground. Pond water gets pumped into the bottom of this barrel, fills it up and overflows/returns out the top of the barrel’s standard 2″ port. The pump’s flow rate is faster then the overflow rate so a ping pong ball float valve is used seal the air vent and force water through the return line. With out an air vent (closed system), the barrel would collapse in on itself from suction as the water travels down the return line. Once again, I’ve used rattail cord & friction hitches to keep things in place and I can just slide up the knots if I need to access the check valve.


Here’s it in action:
Sugar Cane Press
I finally got around to building a Sugar Cane press. Sugar cane is just one of those things that’s been on my mind since my childhood. Nothing like the primal fun of chewing and spitting cane. I even made my own sugar-mint juice as a kid; must made a whole ounce of it :)
So now I’m old(er) and I planted some cane in 2014 and watched it grow for a few years all the while thinking that one day I’d sweeten my coffee with it.
I was looking for a press that I could use by hand just to meet the needs of my family.
My research showed in large that the best equipment comes from India. That the hand operated types usually have multiple gears, vertical cranks, optional motors, and they cost a lot to ship!
So decided to make my own from some coffee cans filled with concrete and steel cable to turn the cylinders. Here it is:
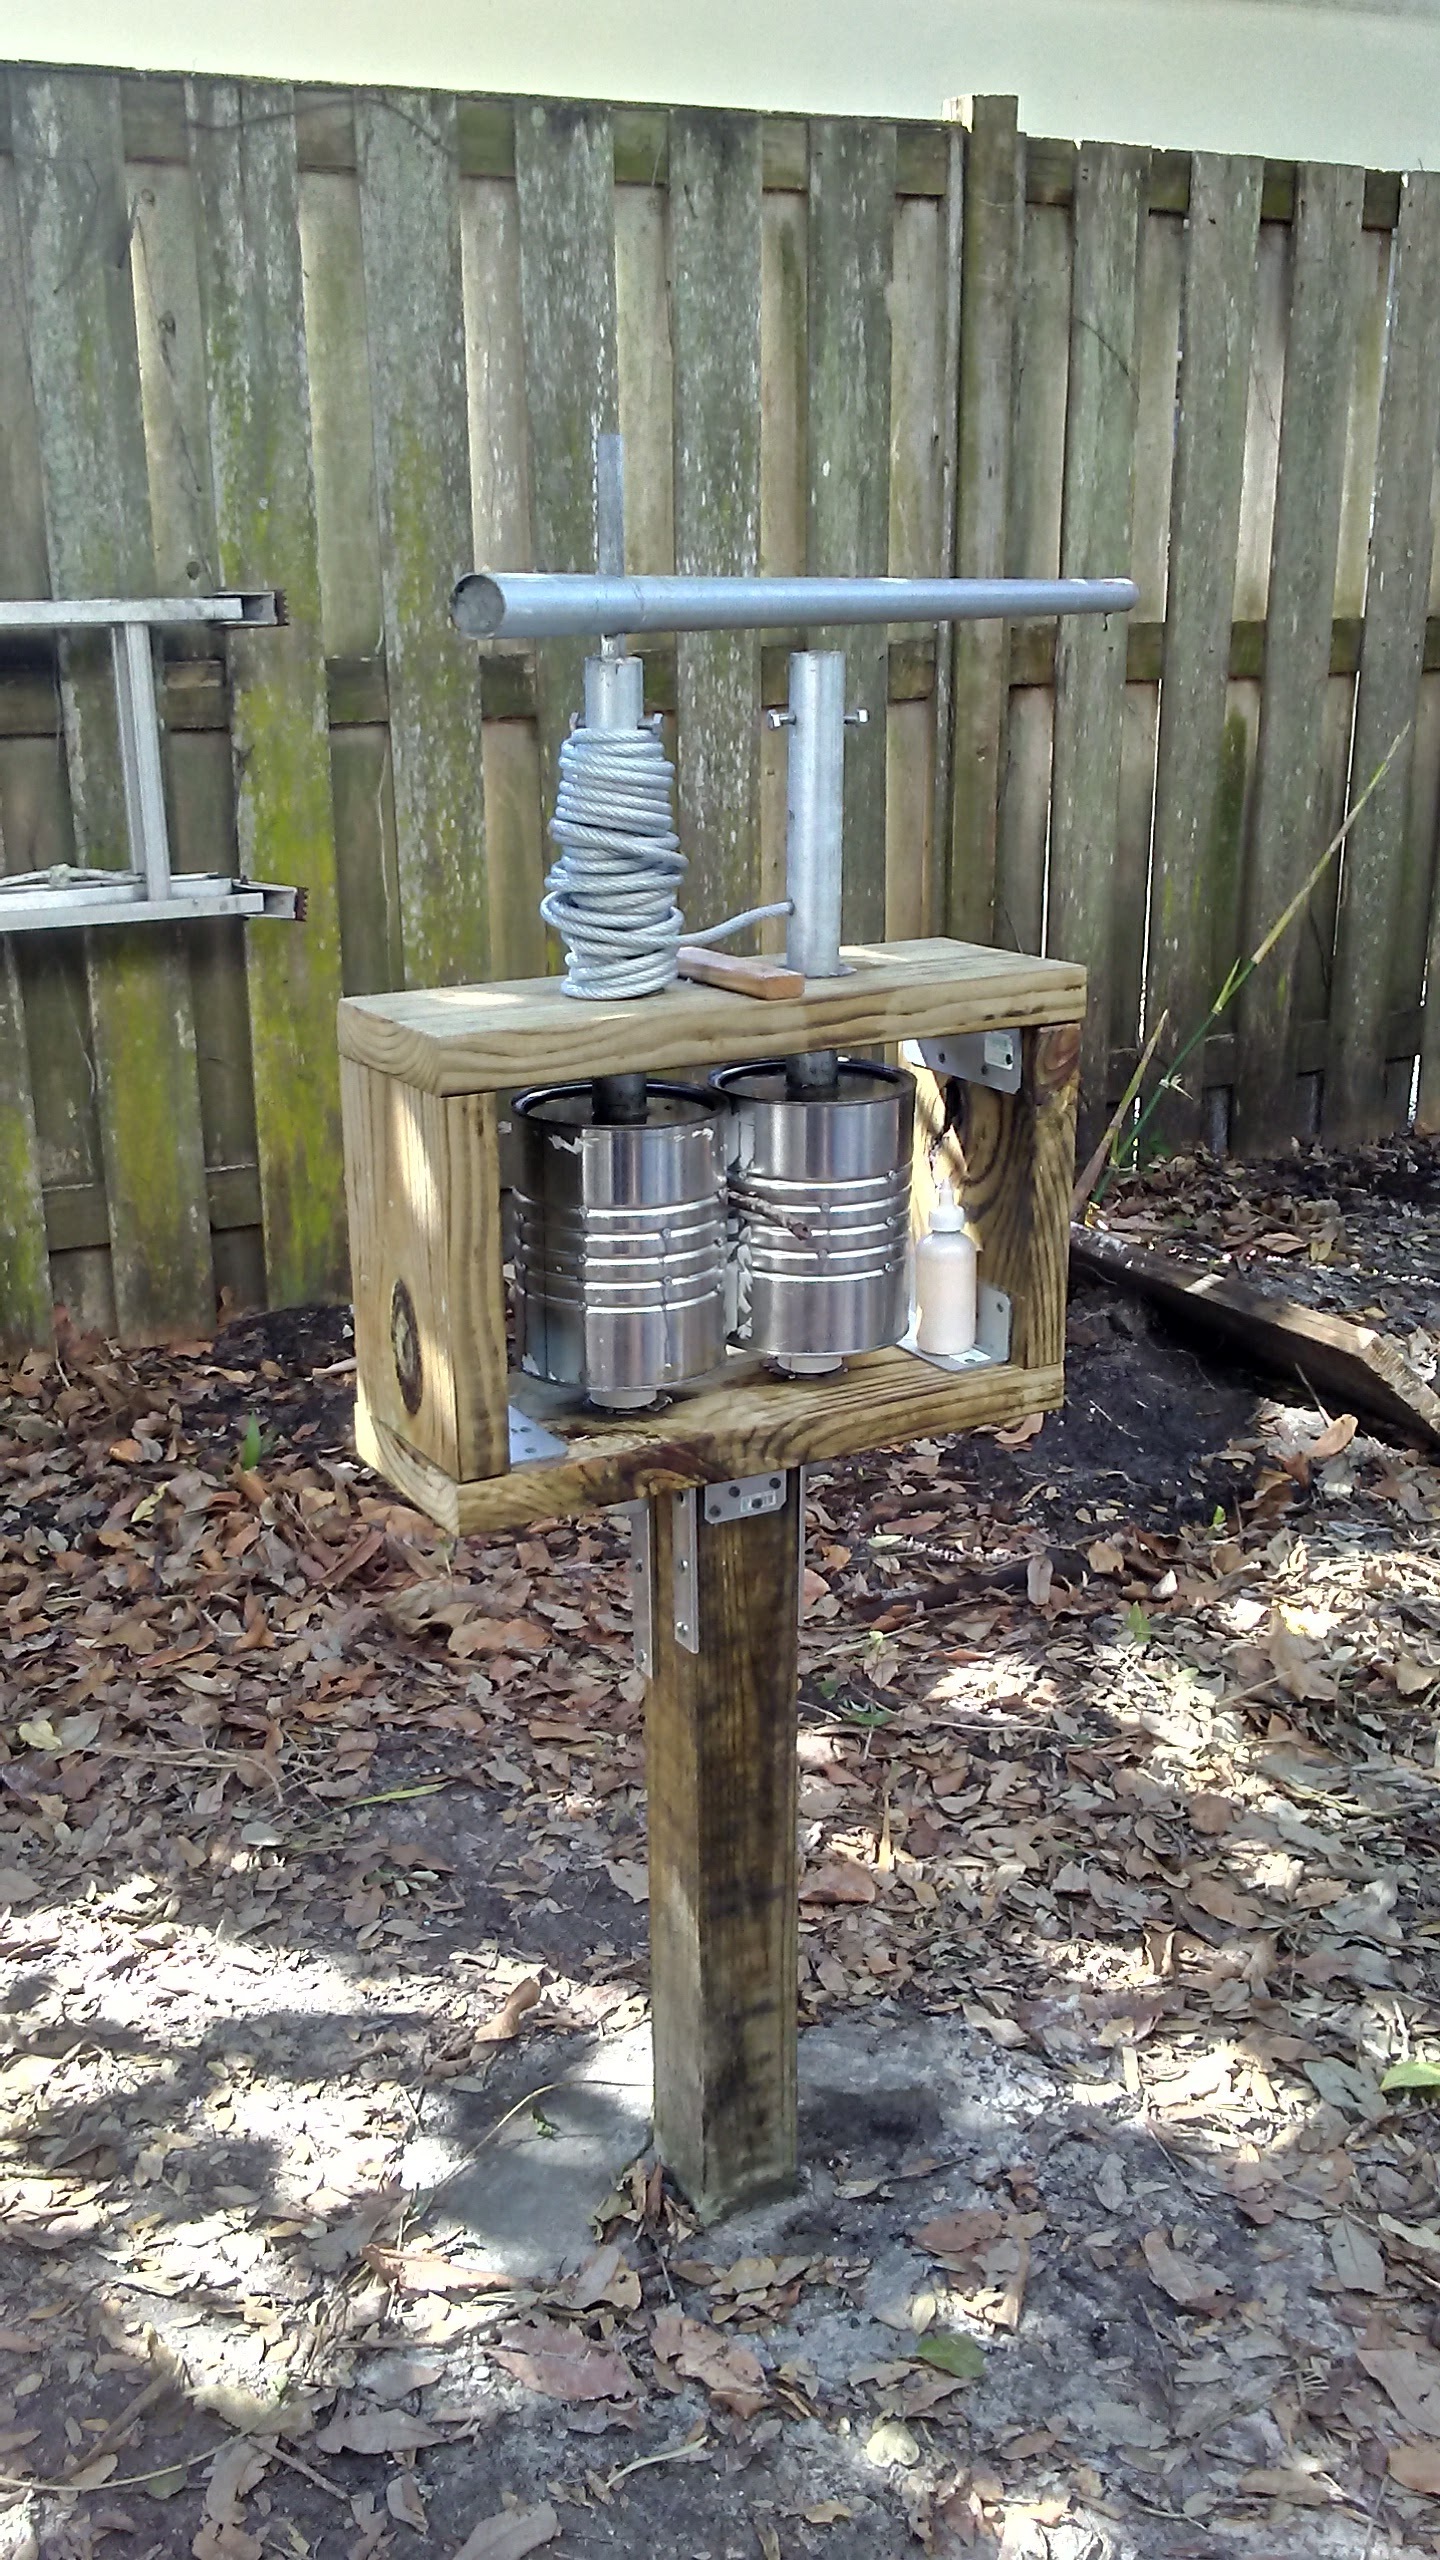
The weakest part the press was the 1/2″ square shafts. They will shear off if the cane is big enough. I grow Badila which regularlly gets over 2″ in diameter so I need to split it in half in order to run it through. The best way to split cane in half I found is by mounting a machete vertical and pulling the cane through the blade.
My cane grows 10-12ft and a tall stock will generate near 2 liters. A smaller-medium sized stock about 4 cups.
Here’s a video:
Here’s how I built it:


Splitting cane
First make sure your machete is sharp (it doesn’t take long to sharpen a machete with a sharpening stone and it’s worth it :). Find a way to mount your blade. I used a clamp and some nails. You start the split by pushing at one end of the cane; just be careful not to push too hard or you’ll cut your hand. Once through, pull the cane from the opposite side. You can back up and angle your cane to correct things if your cut is running off to one side. Here’s a video:
Coffee time :)
The best way to store the juice I found is to freeze it in some water bottles, or some small mason jars. Cane juice last about a week in the fridge before it starts to turn. I pull a bottle out of my freezer once a week for fresh juice. Here’s are some pictures :)

Some useful links:
- https://www.youtube.com/watch?v=1Zs6kmn3Ivw&t=403s
- https://www.youtube.com/watch?v=PvrrlkdjI4E
- Here’s a thread on a similar experience
- https://permies.com/t/54534/Quest-Sugarcane-Press
What I learned from the thread is that you should search for sugar cane “crusher” (not “press”).
- https://permies.com/t/54534/Quest-Sugarcane-Press
Flash Cards with Google Spreadsheets
I slapped together a flashcard javascript library. The library pulls data from Google Spreadsheets and displays responsive and swipeable flashcards. I use it on my android phone: I have two icons, one to quickly add new words to my spreadsheet and the other for viewing the words in flashcard format.
Here’s a live demo:
http://www.dittyjamz.com/samples/flashcards/
This library is open source and is a part my samples repository on GitHub. You can check it out here:
https://github.com/shaun-moen/samples

The Hidden Native Ranch Salad
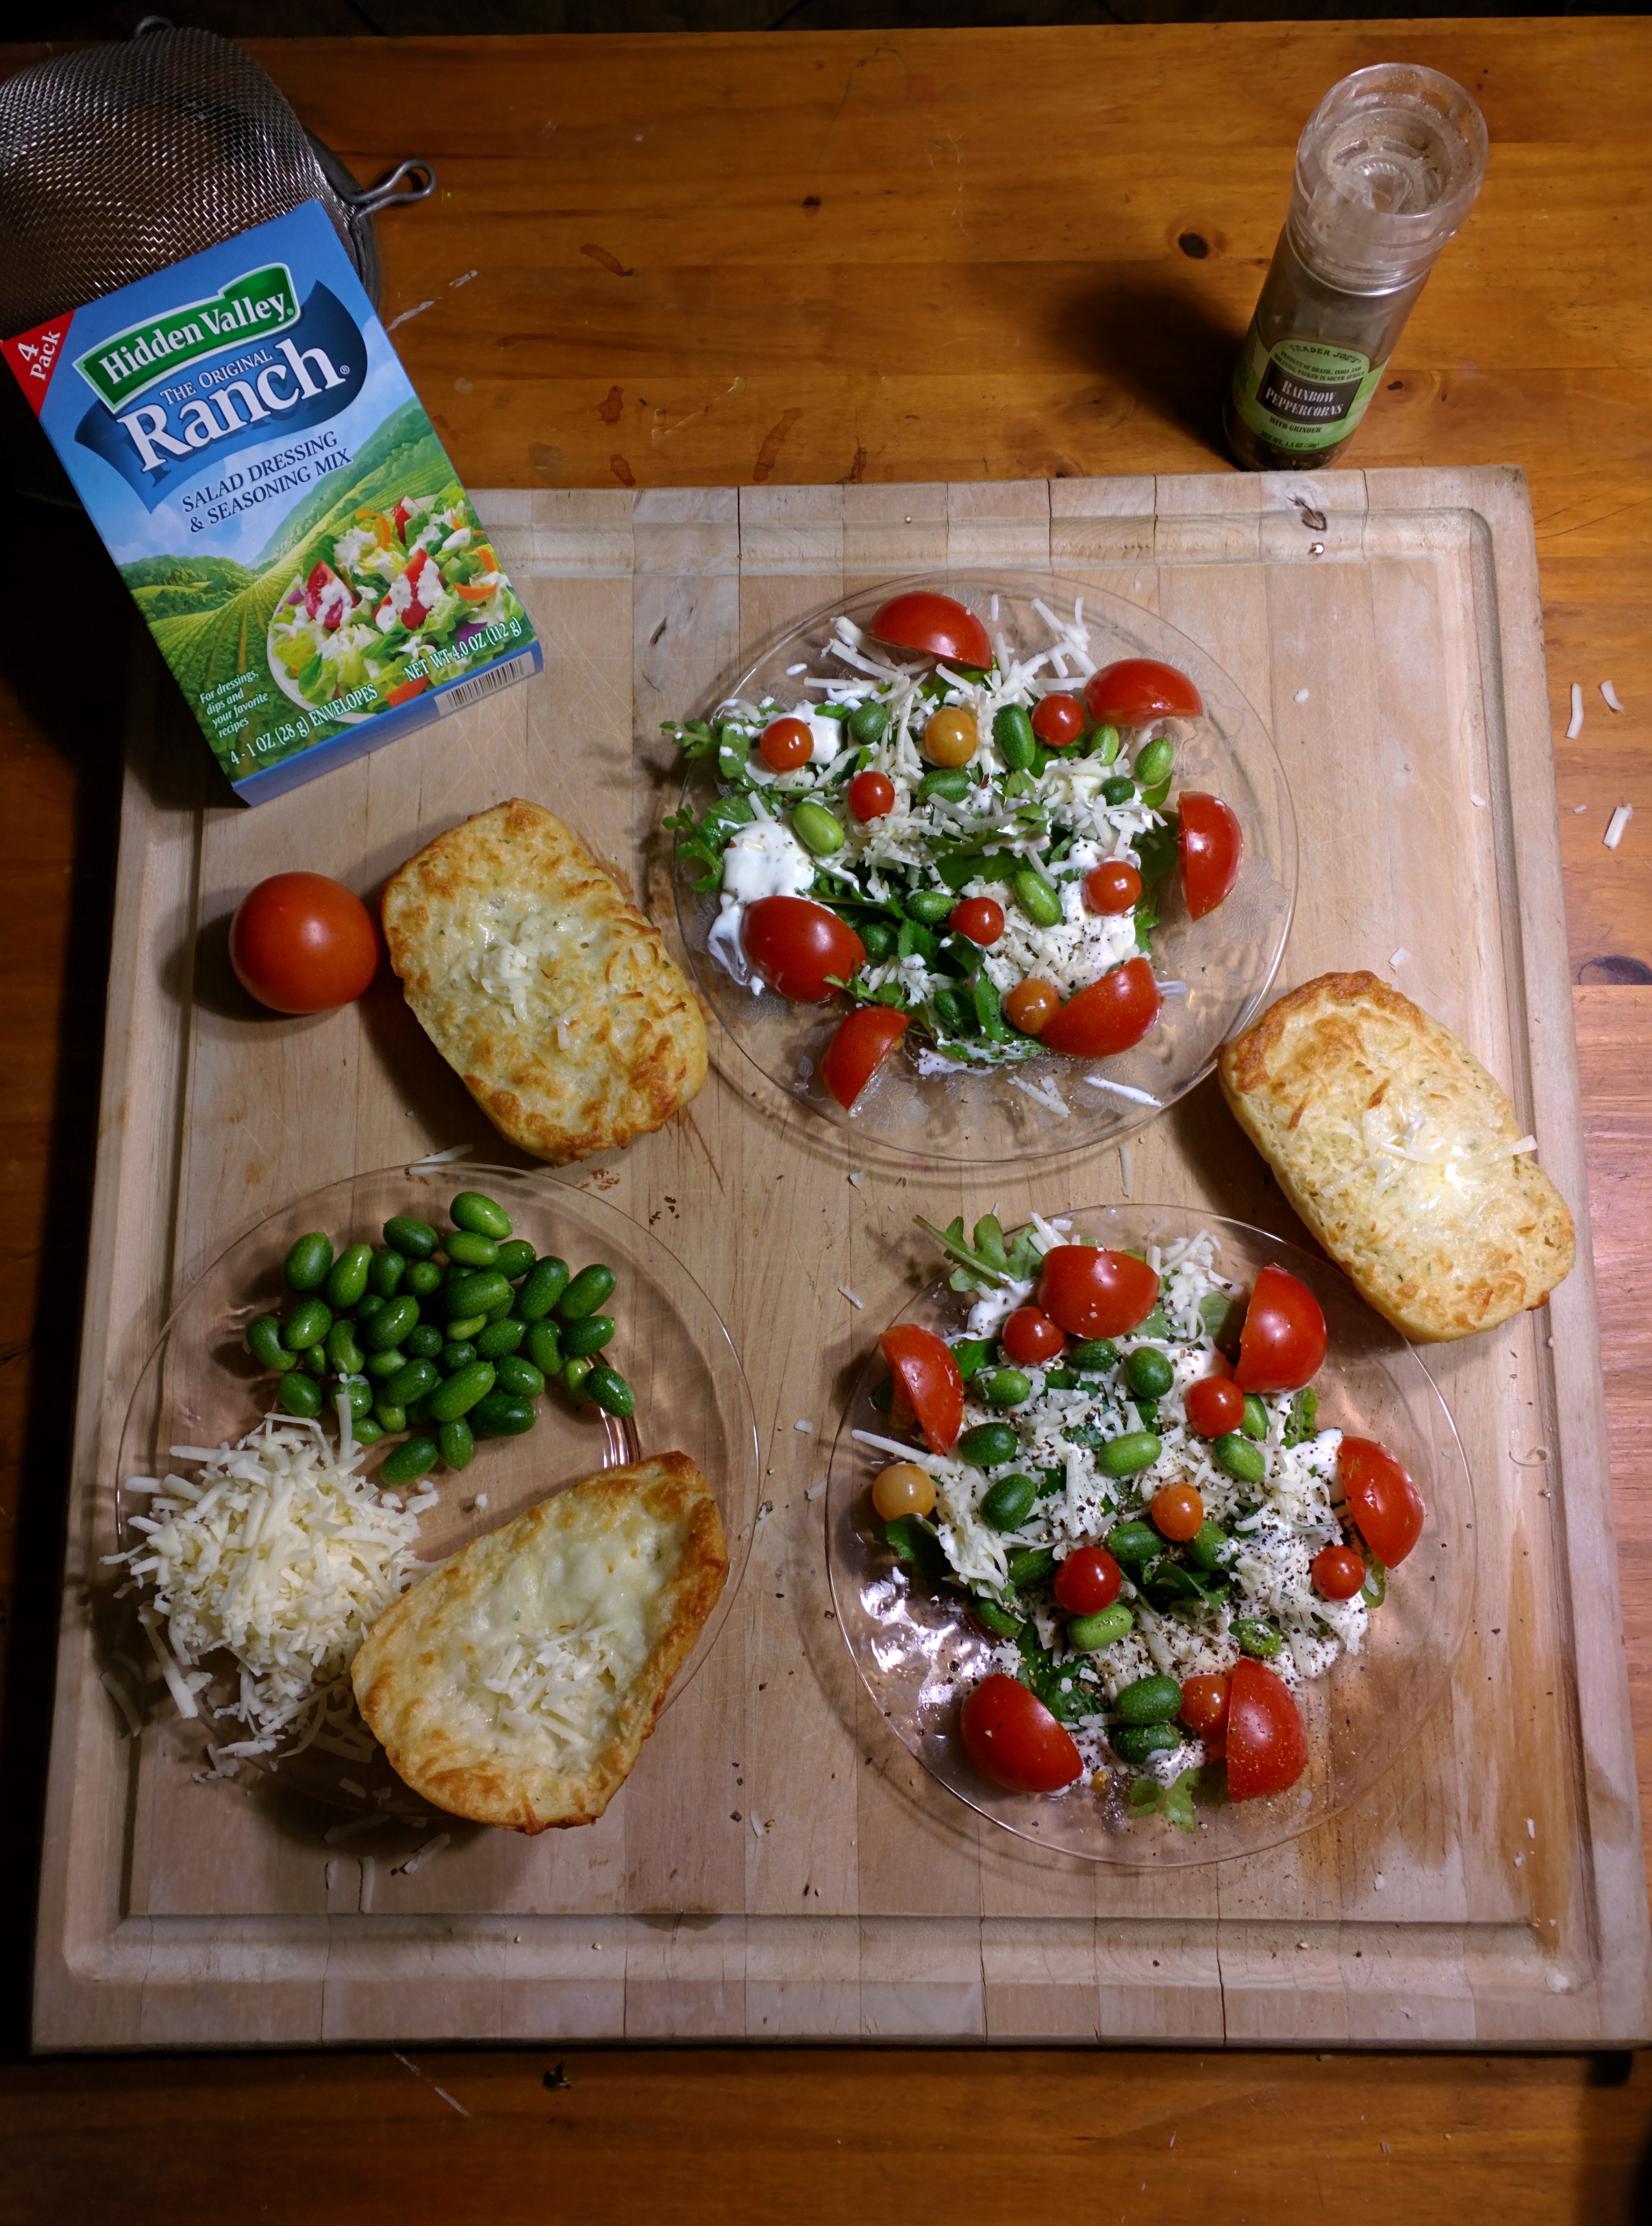
I’ve been waiting a while to make this Florida salad. Most of the ingredients in this salad are native or naturalized plants to Florida. Which means you can grow them in your yard without added supervision.
I’ve replaced:
- Store bought Romaine lettuce with Crepis Japonica.
- Store bought Tomatoes with Florida Everglades Tomatoes.
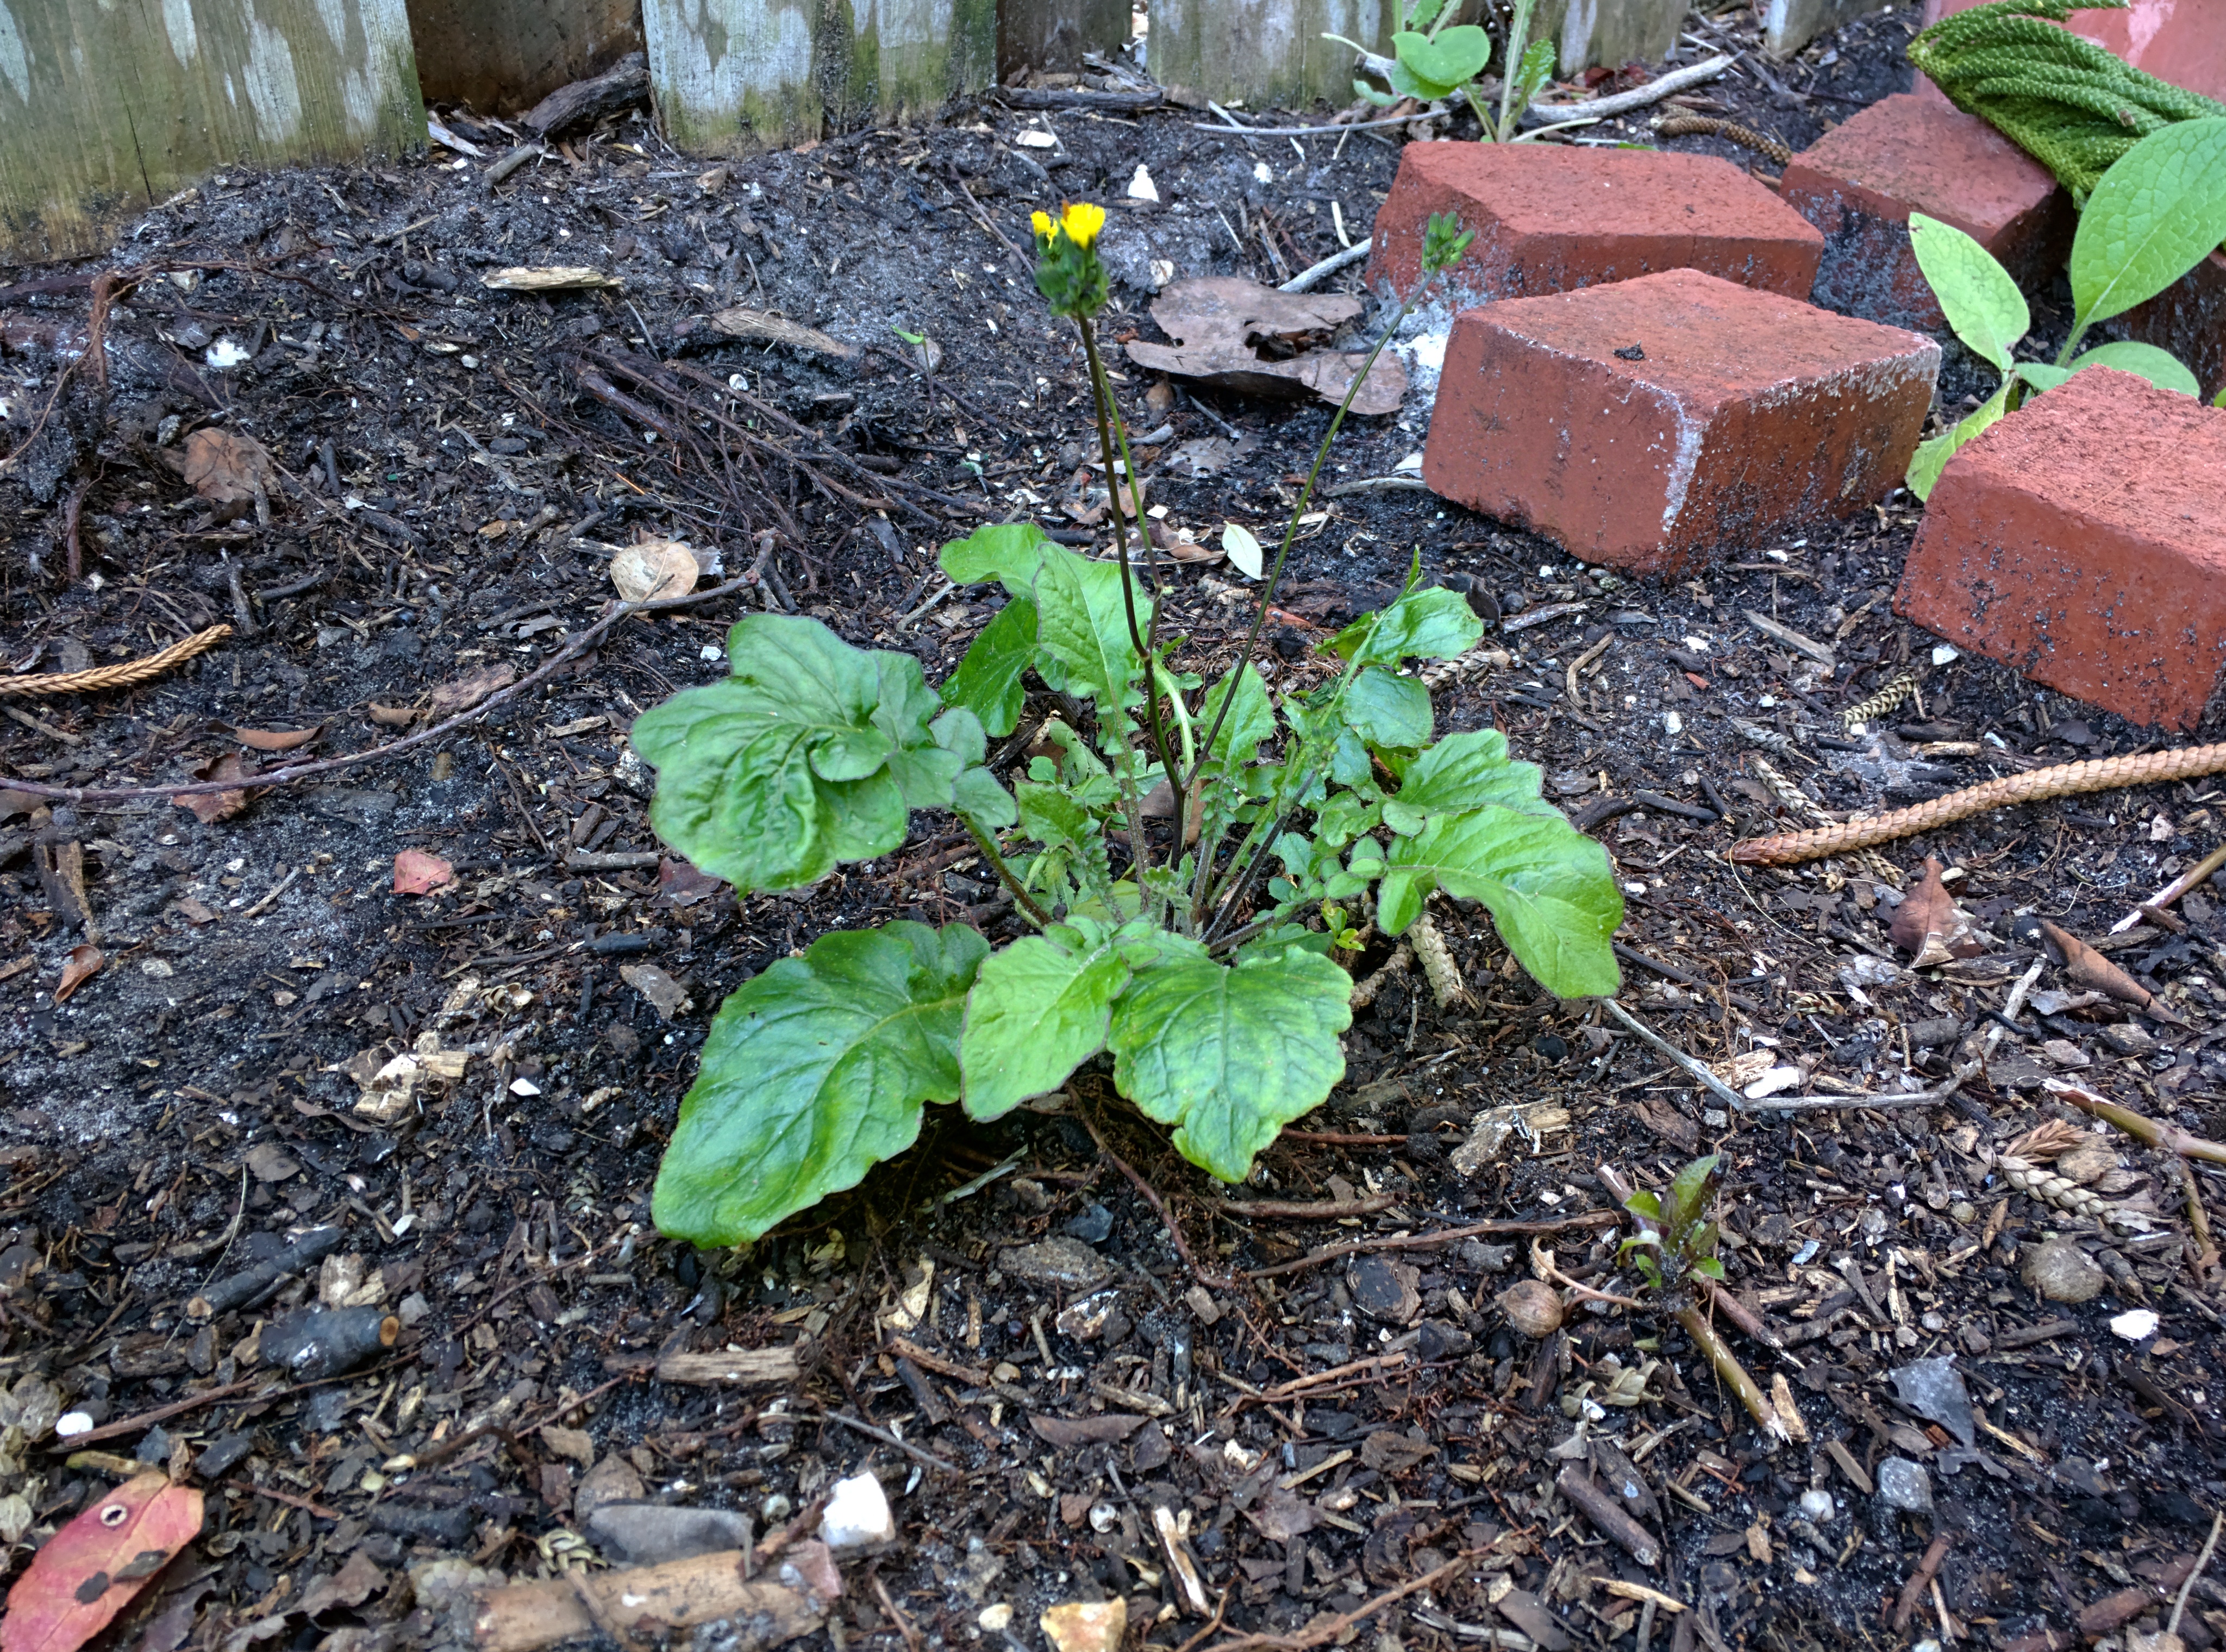
- Store bought Cucumbers with Creeping Cucumber: Melothria Pendula
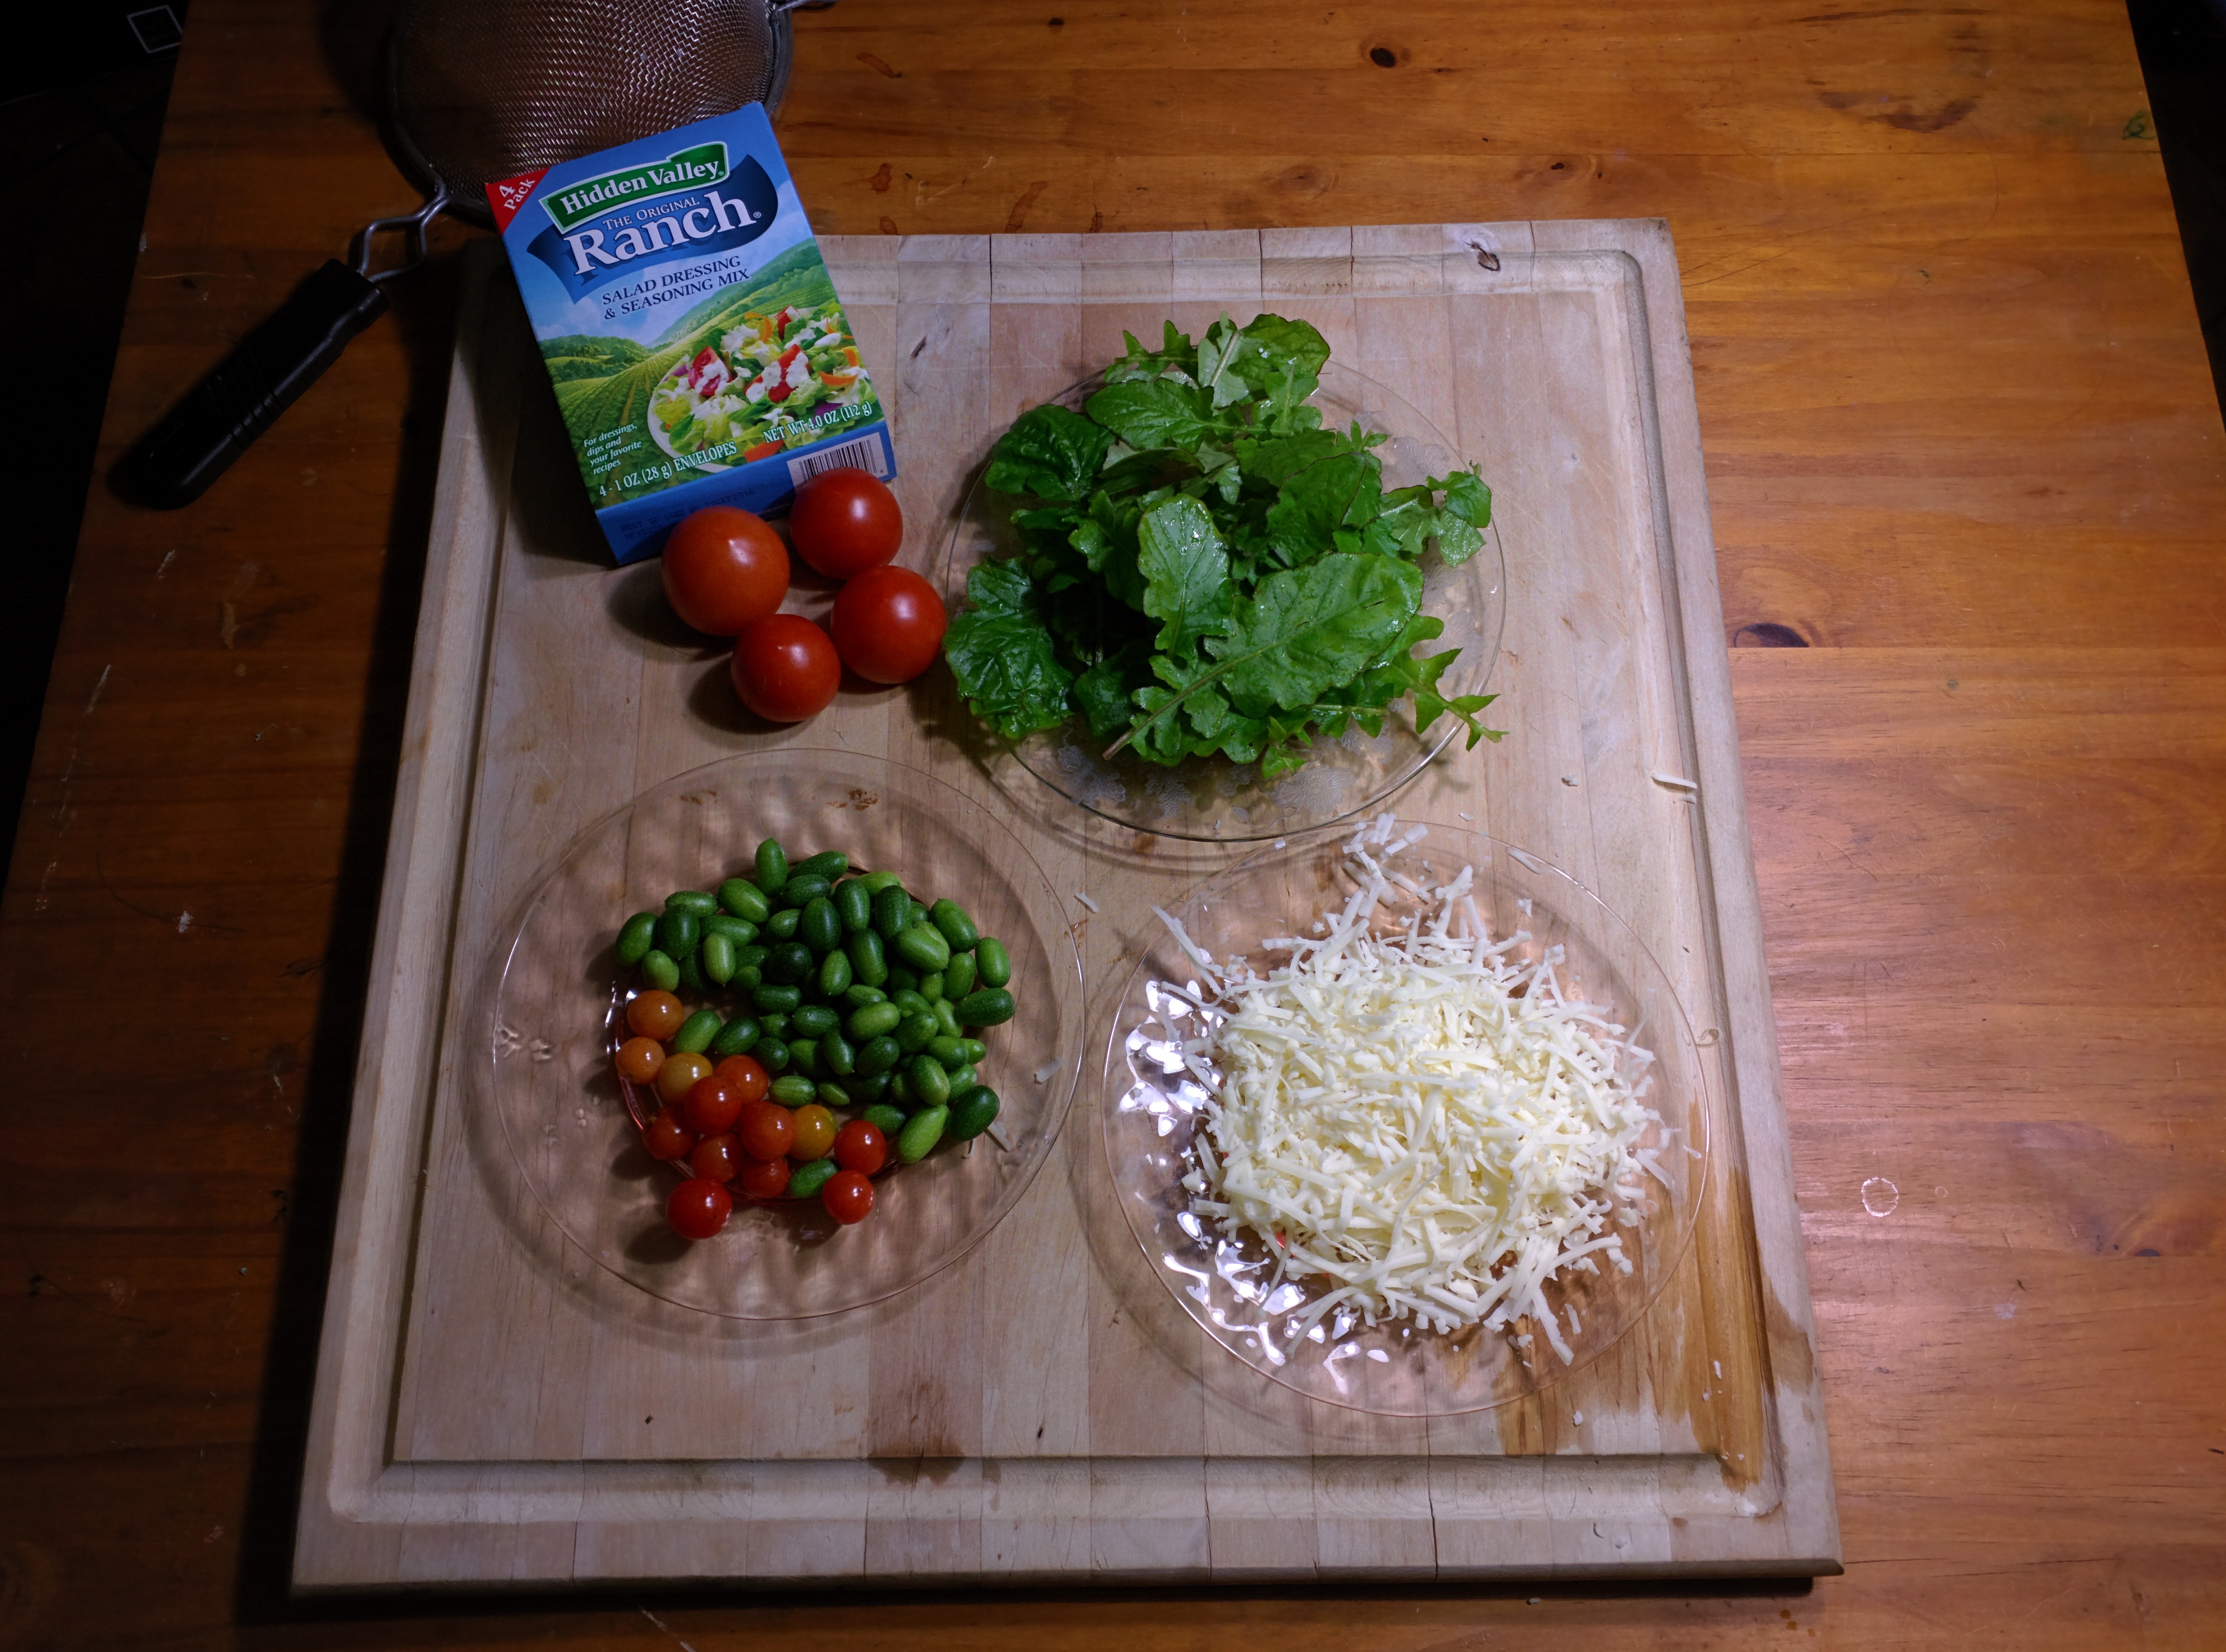
Crepis grows all over here in Florida, it’s in the same family as Dandelion, and according the Green Deane, it has similar nutrition (as far as he can remember). It’s the closest I’ve found in taste to Romaine (minus the texture).
Future renditions of this salad will likely include wild onions/garlic/chives (something of this nature). And potentially ground papaya seed as a replacement for pepper. We’ll see.
Word of caution: Melothria Pendula should be eaten green only, preferably a little lighter green then the ones you see in my salad. See links above for more information.